
Ceramic Tarot Card Boxes
Two attempts at making a matchbox style box for my tarot cards.
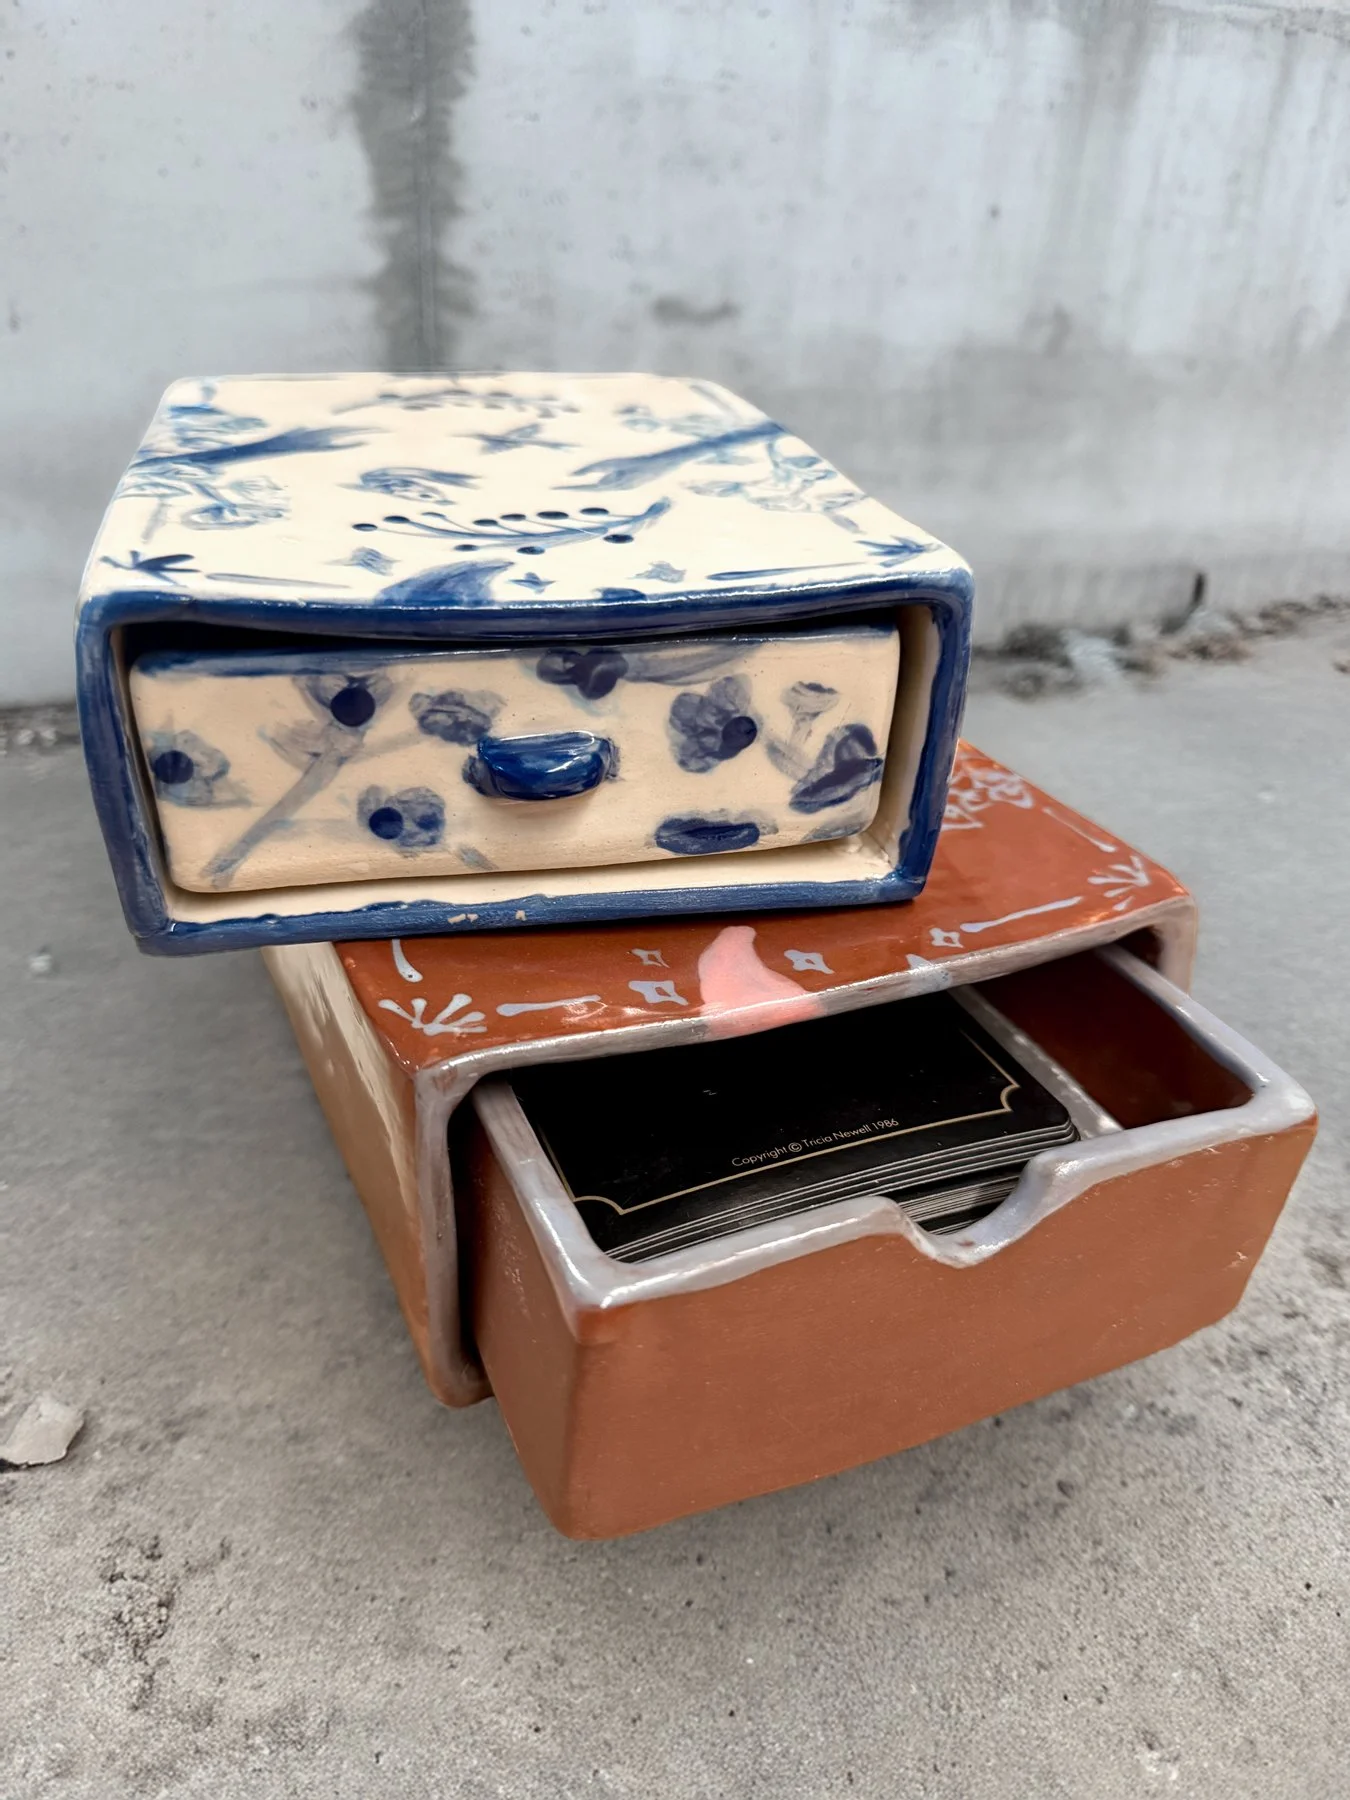
Found my old tarot deck from over 20 years ago. The deck is The Mythic Tarot by Juliet Sharman-Burke and Liz Greene, illustrated by Tricia Newell. They were kept in a wooden box. The lid had warped and was held close with an elastic band that was so brittle it fell apart to the lightest touch. Surprisingly, the cards were in great condition. I decided to make a new home for my deck out of clay… The idea seemed pretty straight forward. I envisioned a matchbox style box with a pull-out drawer. For an aspiring ceramist like myself, little did I know there were so many technical lessons to learn!
First try: the blue and white box
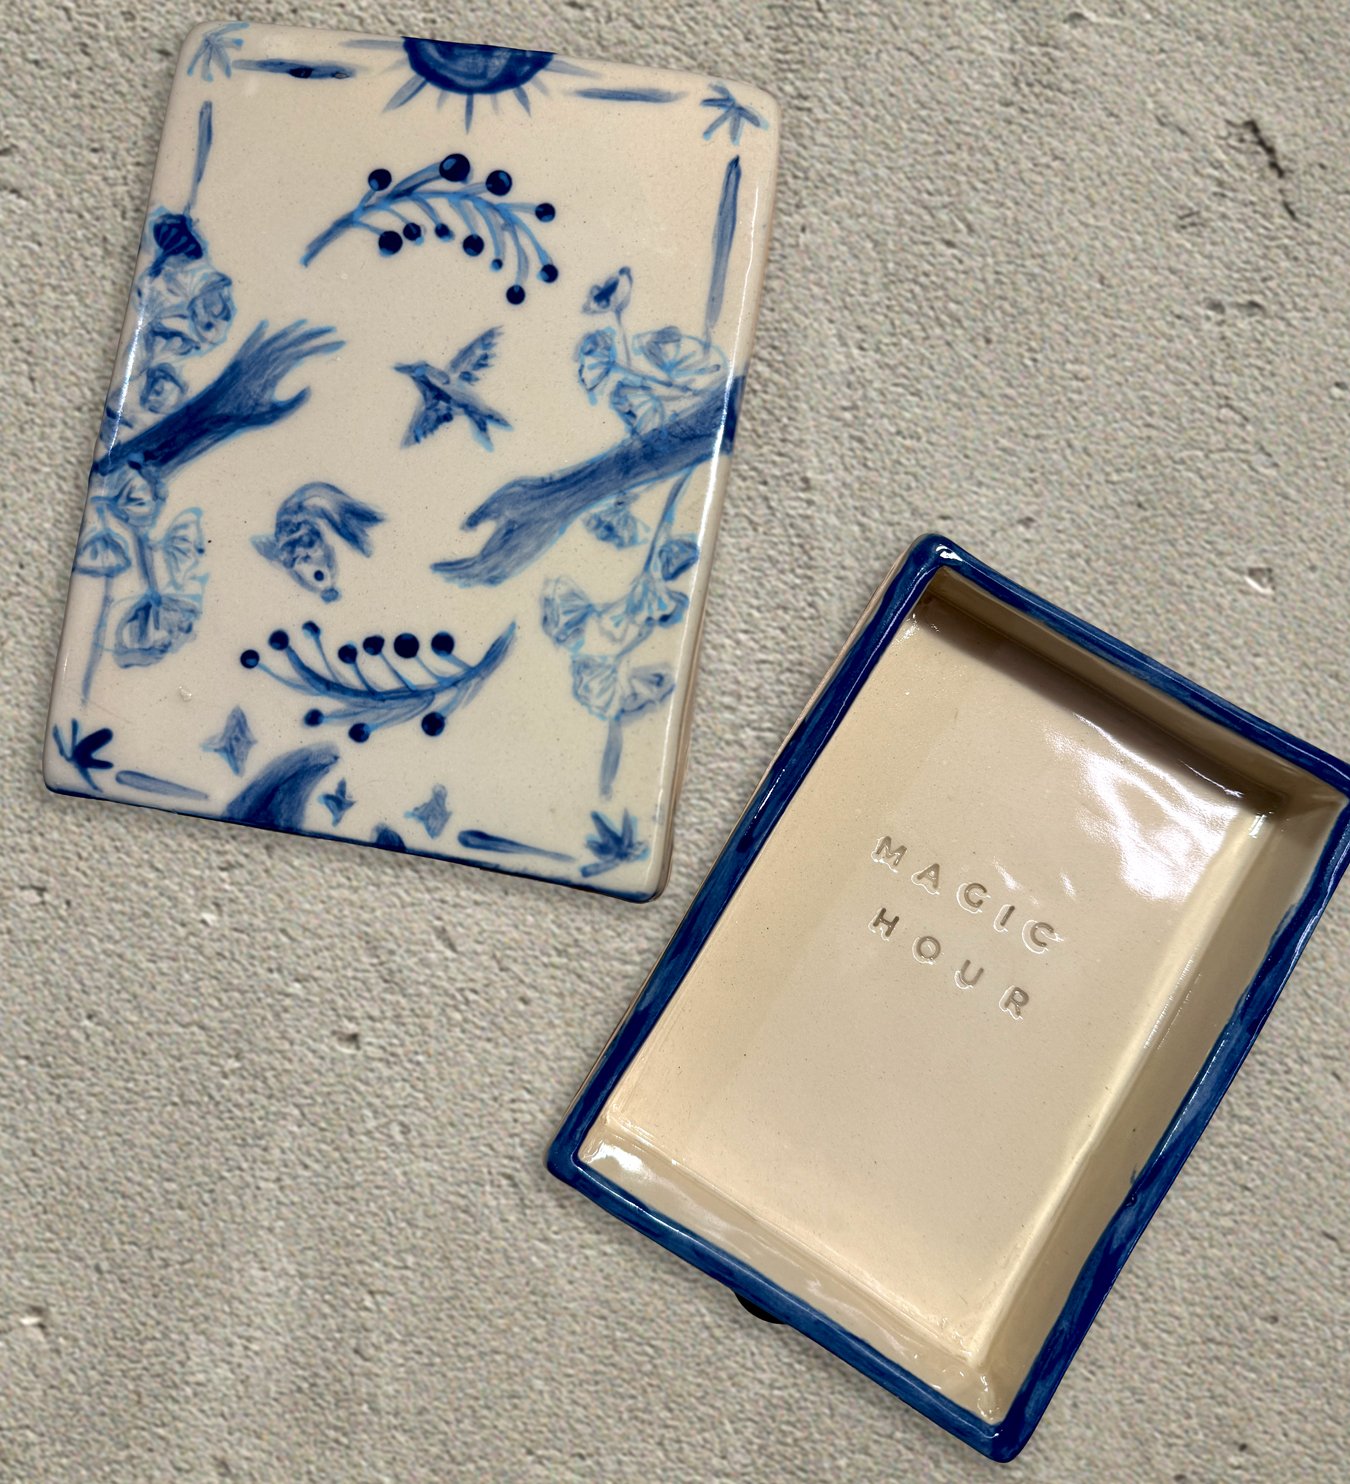
First try at my tarot box. Testing out the construction specs and original art work painting with blue underglaze on white clay.
The initial idea was to have a pull-out drawer style box, kinda like a matchbox but with one solid wall at the back. Based on the dimensions of the deck, 5-1/8” X 3” X 1”, I worked out a rough estimate for the initial template. Technical points to consider were clay shrinkage, width of slabs and how the inner box will fit inside the outer box. Sounds simple, right? Yes and no… more on that. The bigger and definitely more fun challenge was a suitable concept for the art work.
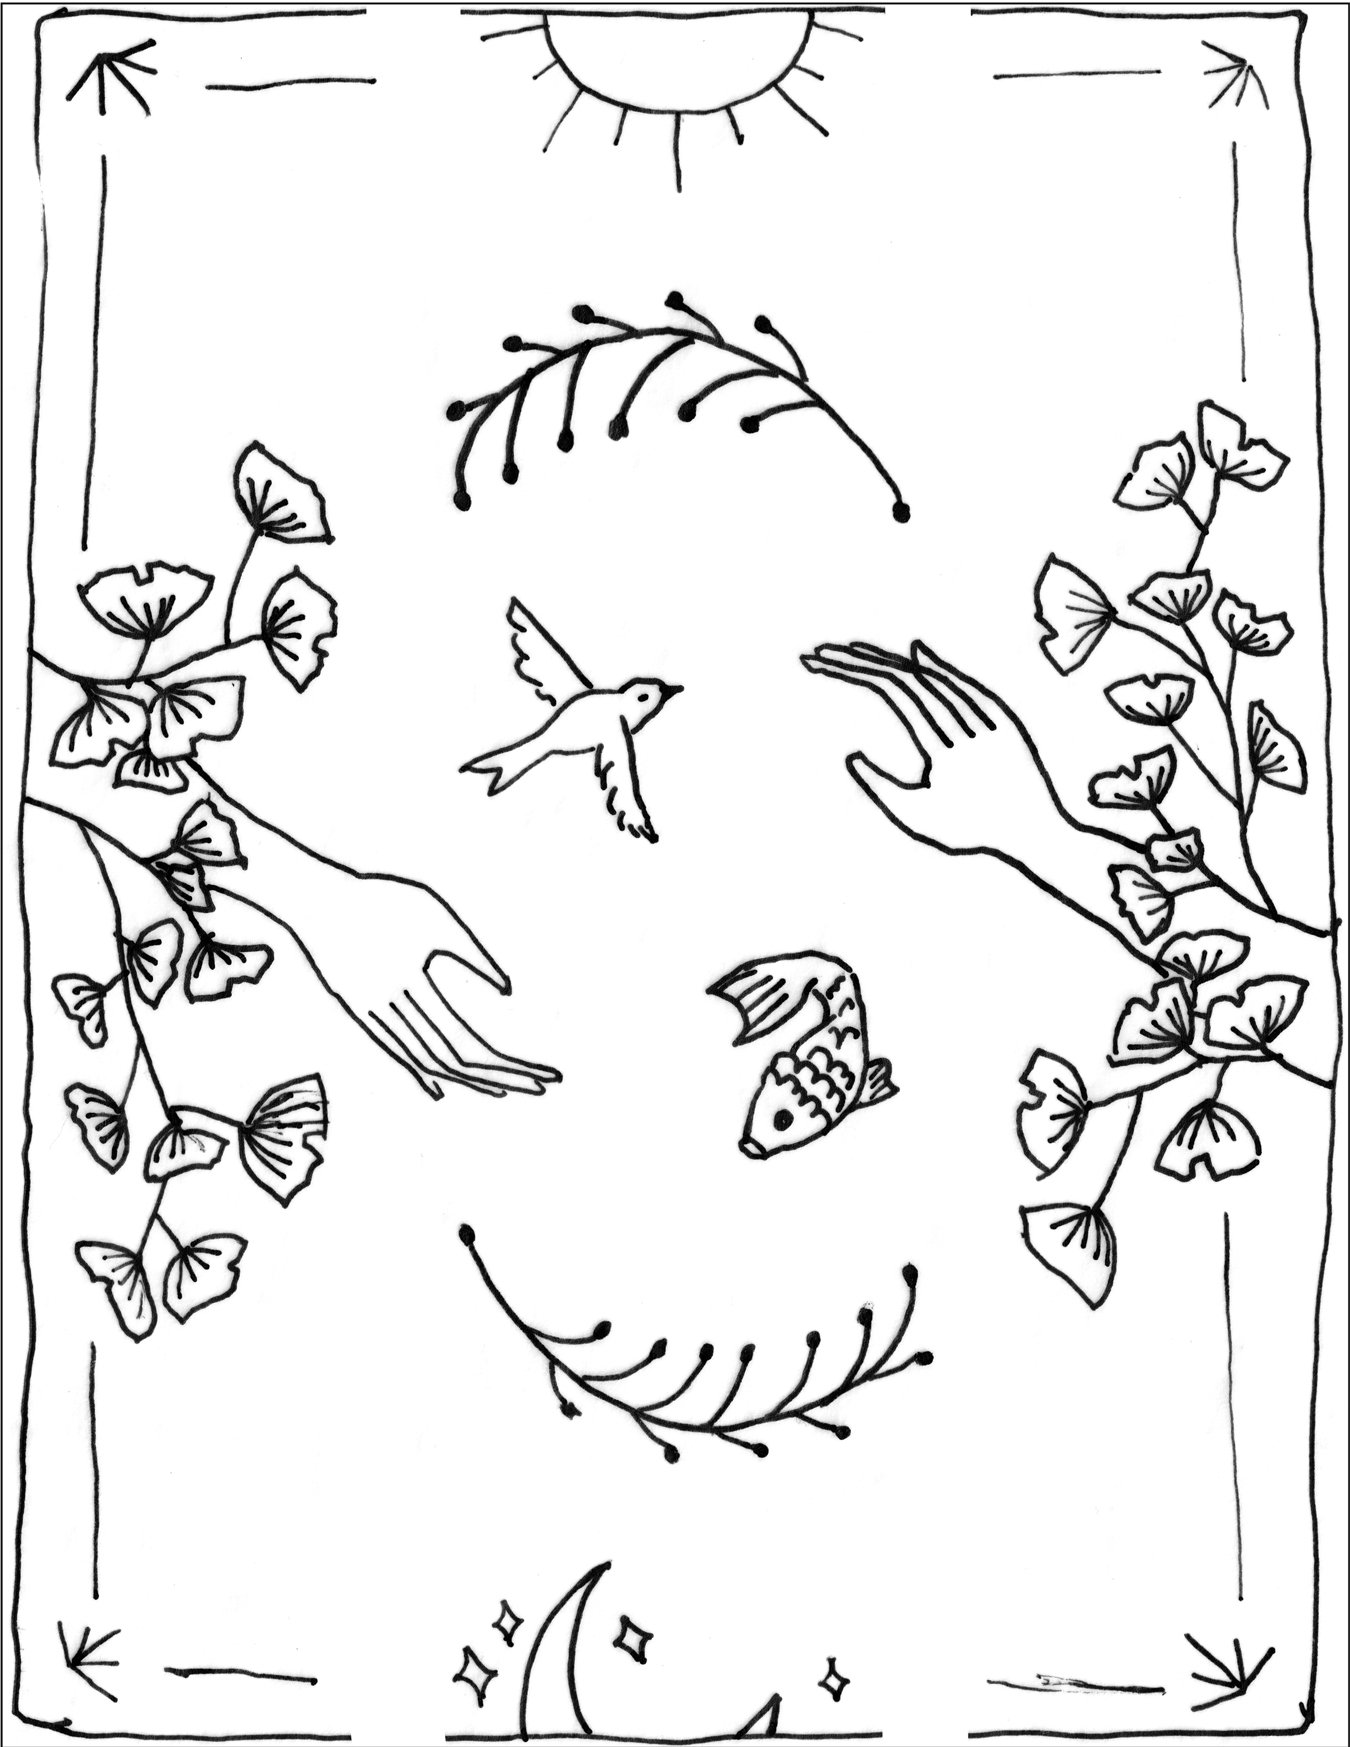
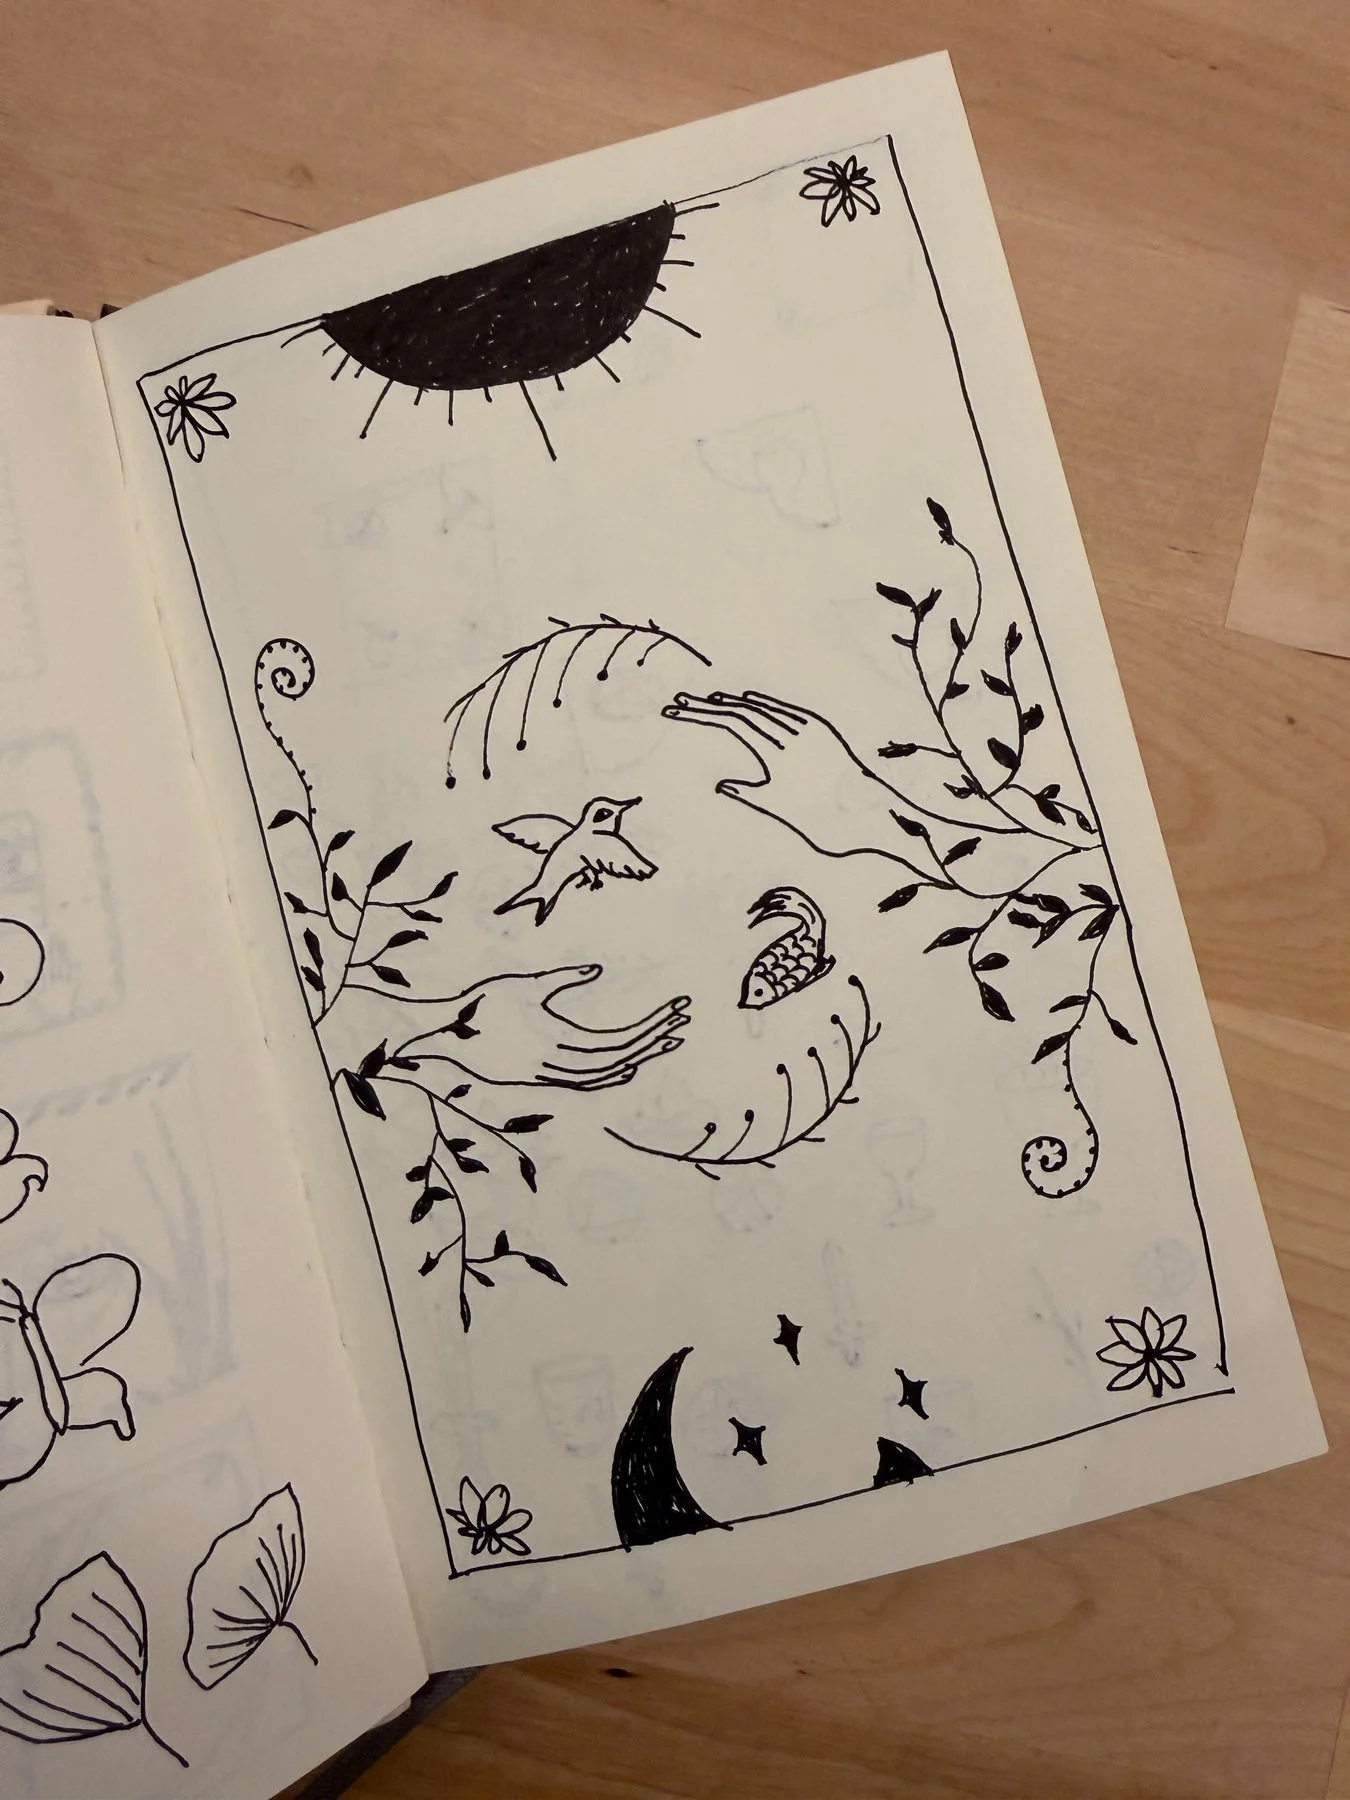
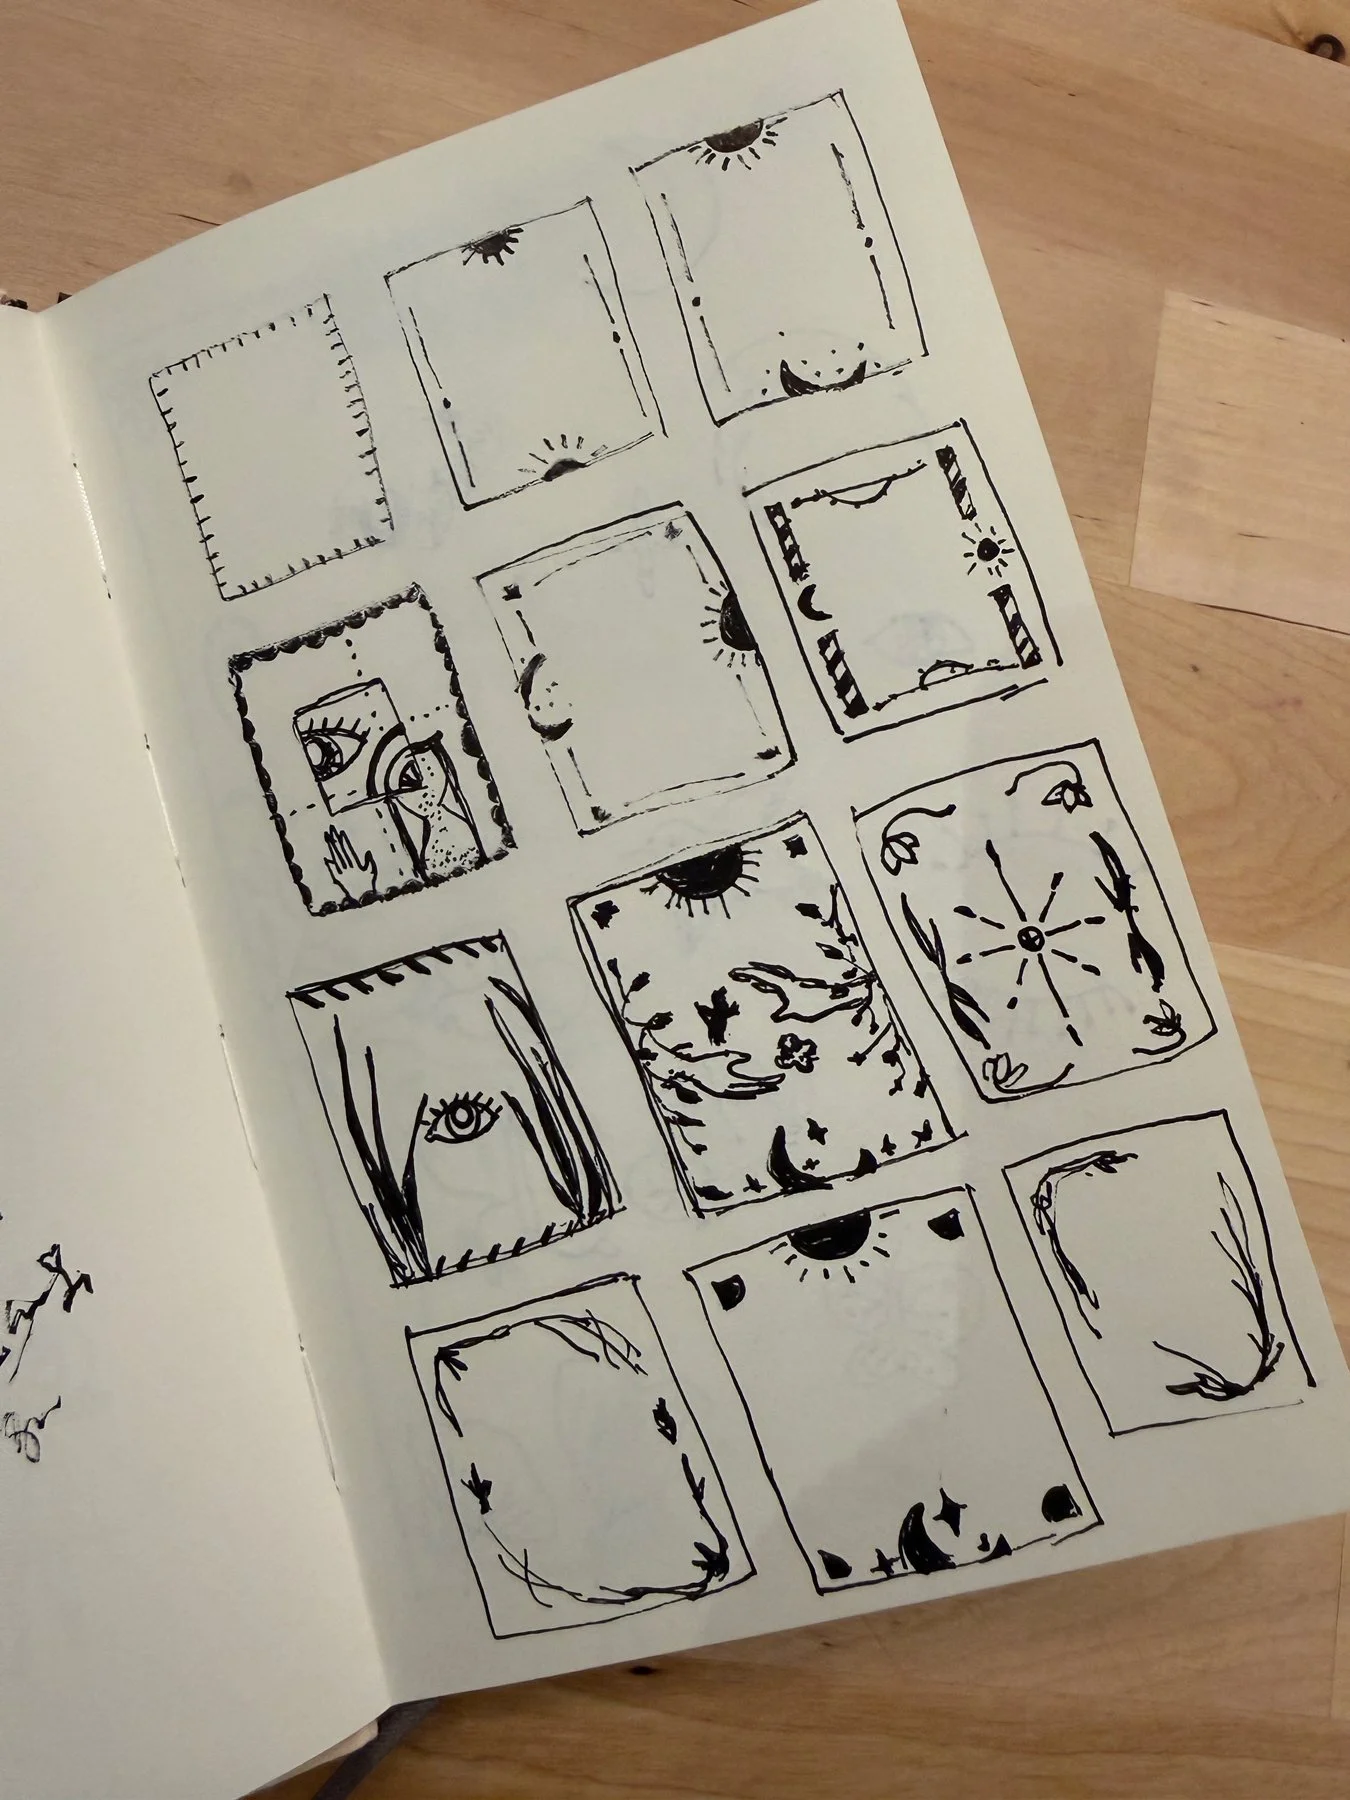
Having carte blanche for artwork can be a blessing but hard to get started! Since this is a personal piece, it can be whatever I want. I had set parameters for myself. I wanted to incorporate an original illustration and concept. Nothing too woo-woo or hardcore tarot, mainly because that doesn’t feel right for me. I am attracted to the idea of ambigram and cyclical nature. Started with some thumbnails and this circular hands motif felt the most authentic for me.
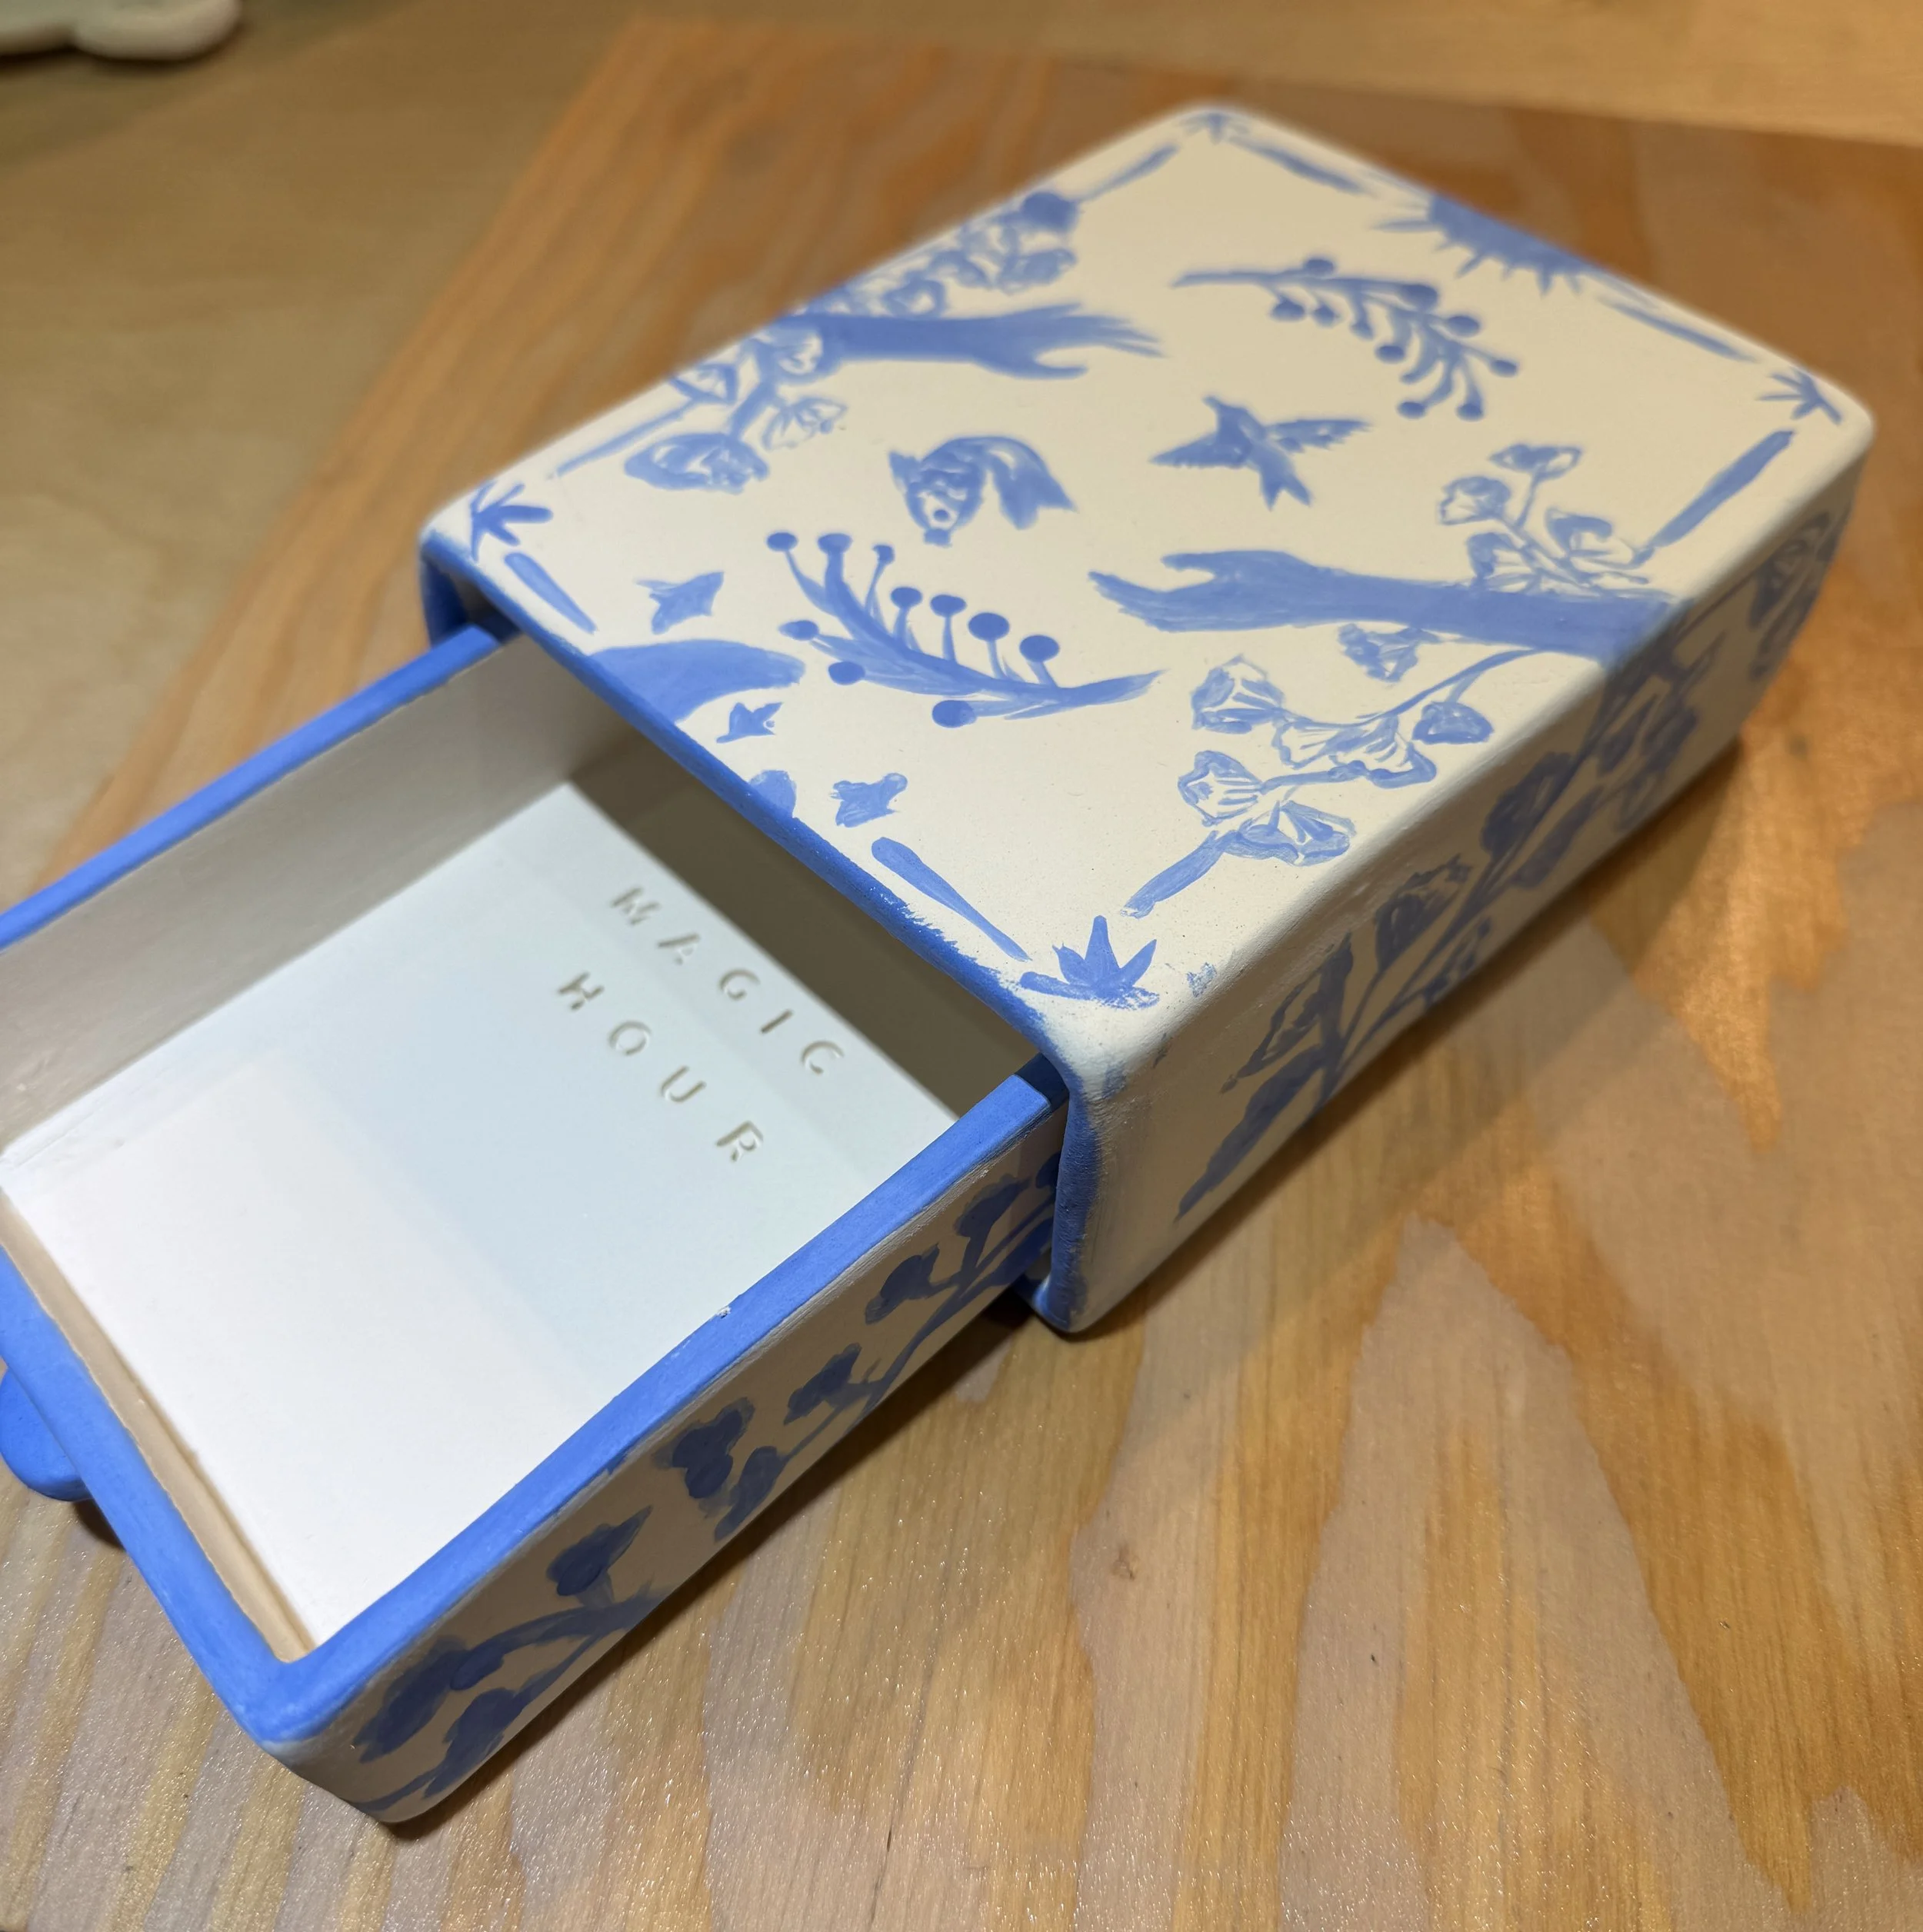
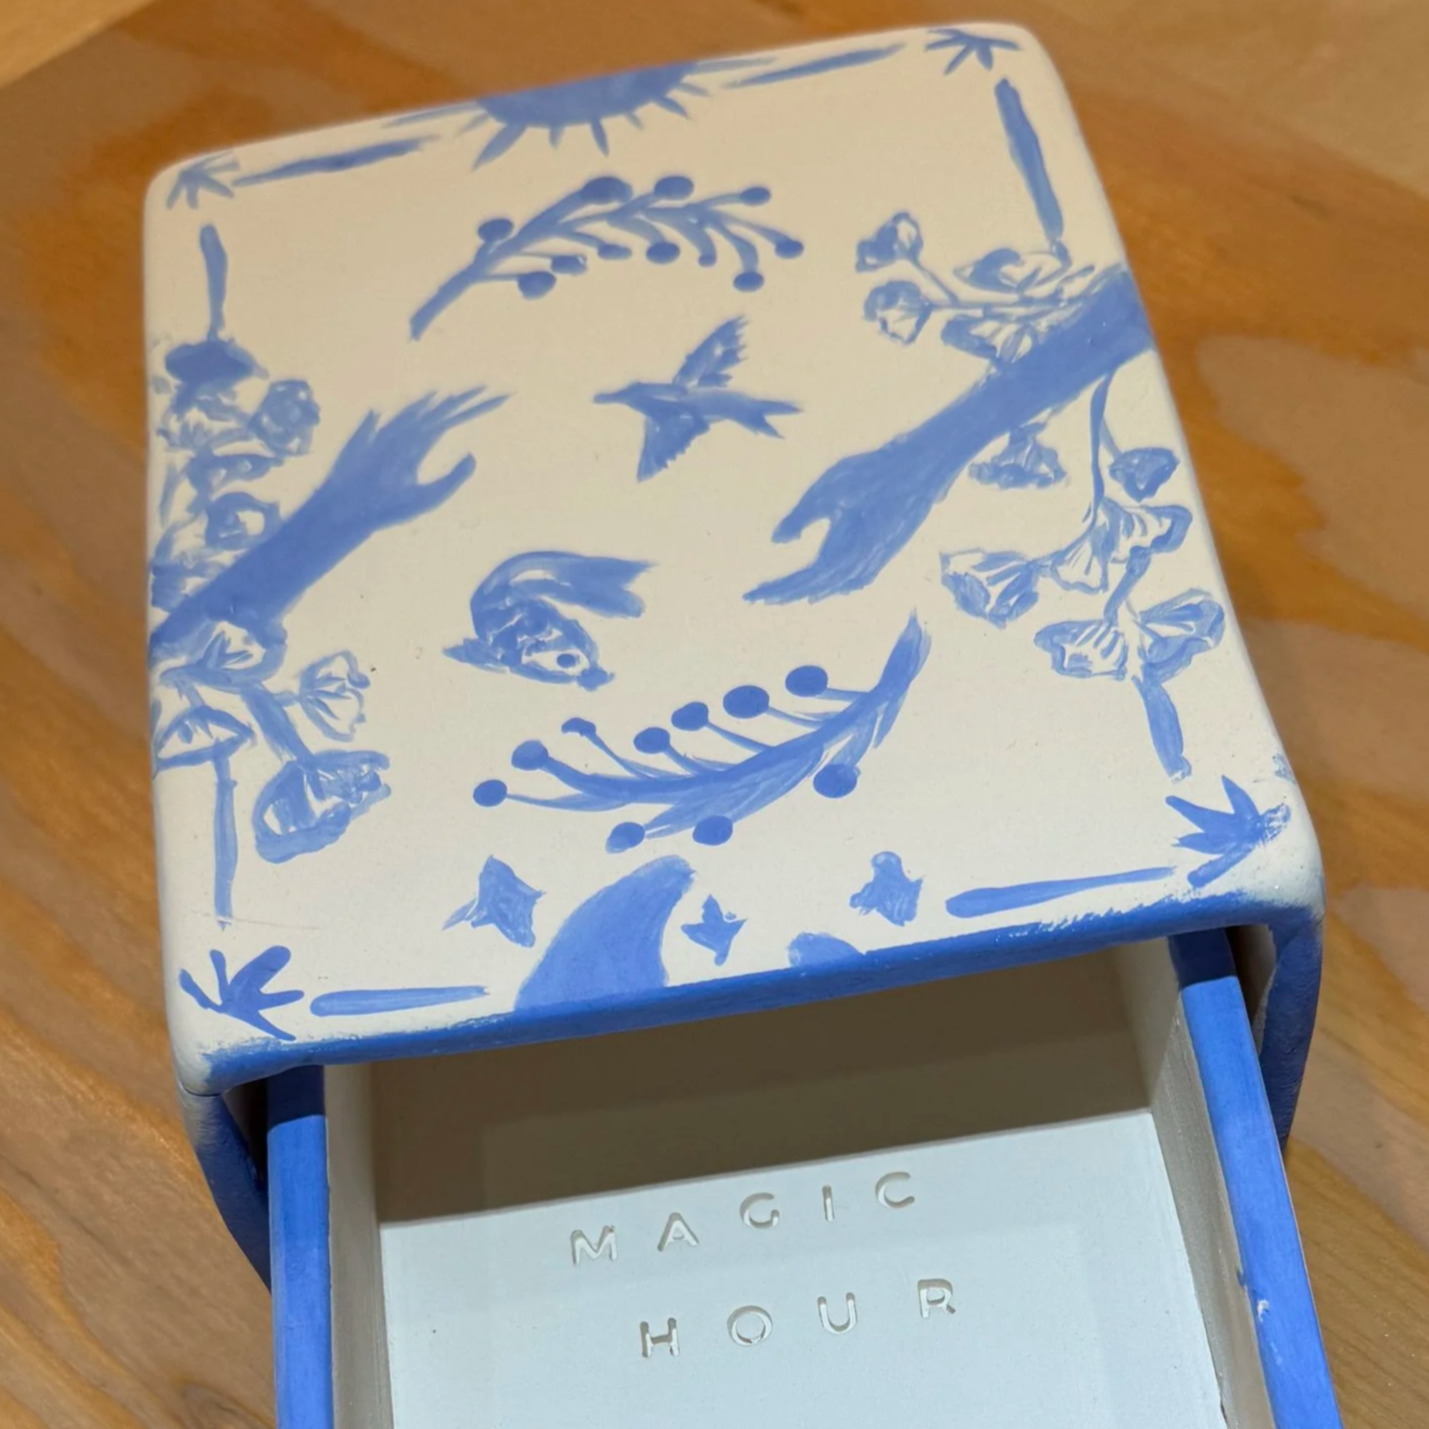

I had a inkjet print out of the art work and use it as a transfer to the box top when it’s greenware. The art work was painted with King Blue under glaze. This is the result after bisque firing. Sadly, the corners showed hair line cracks. The art work turned out fairly decent. I liked to have more details and finer lines so that’s something to work on as well.
Patching up the cracks with vinegar slip.
Attempted to patch up the cracks with slip and vinegar. Also added finer line detail in turquoise under glaze, using the finer liner applicator tool. This went for a second bisque firing. The cracks seemed to have minimized. I added a clear glaze and sent them for the glaze firing.
The King Blue under glaze turned out a lot darker. I don’t mind the blue and white china look. Think it enhances the overall style. The second rendering of the Turquoise under glaze added some depth, but I’m not sure if it’s for the better.
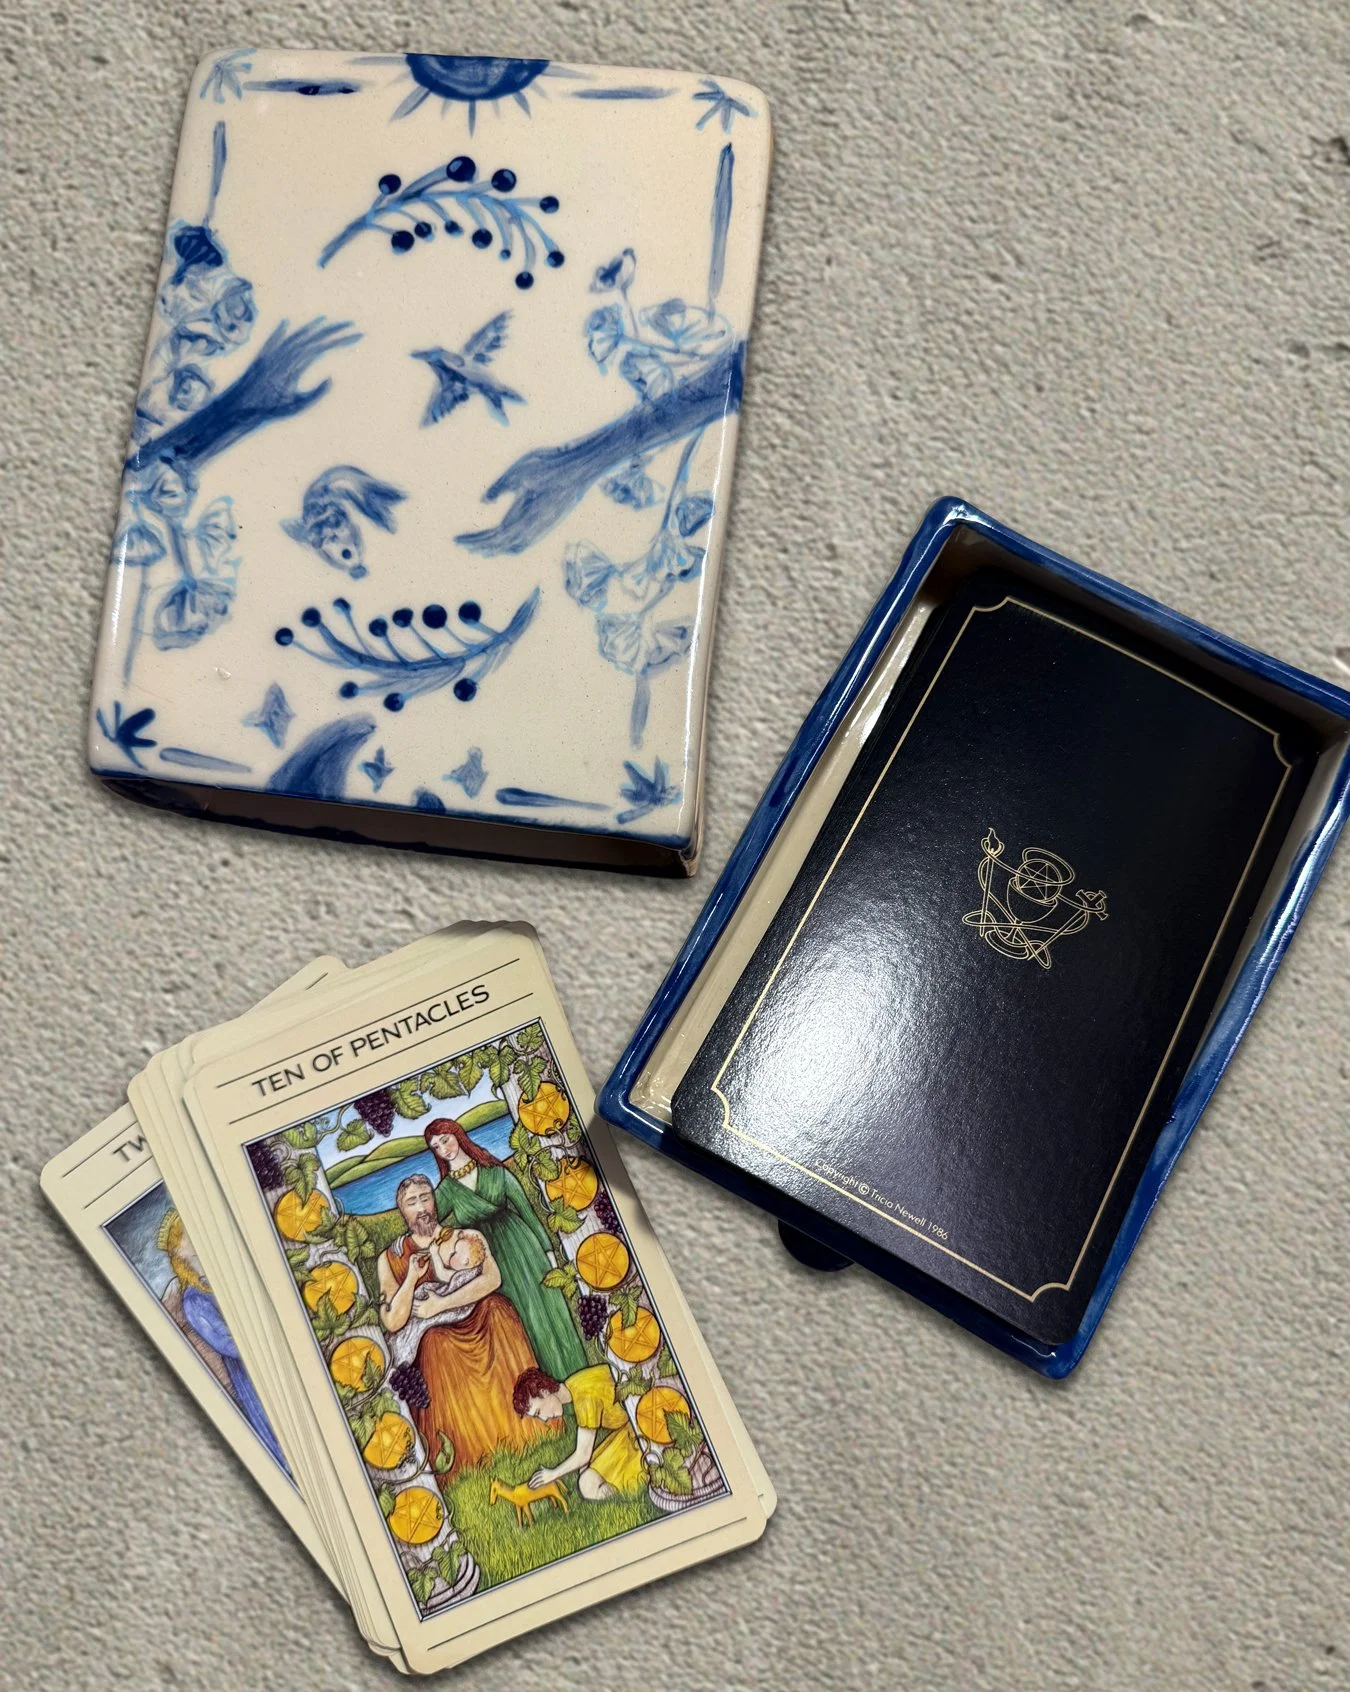
This would be the third firing so the boxes shrank more than original calculation. Now the tarot deck won’t fit. Bummer.
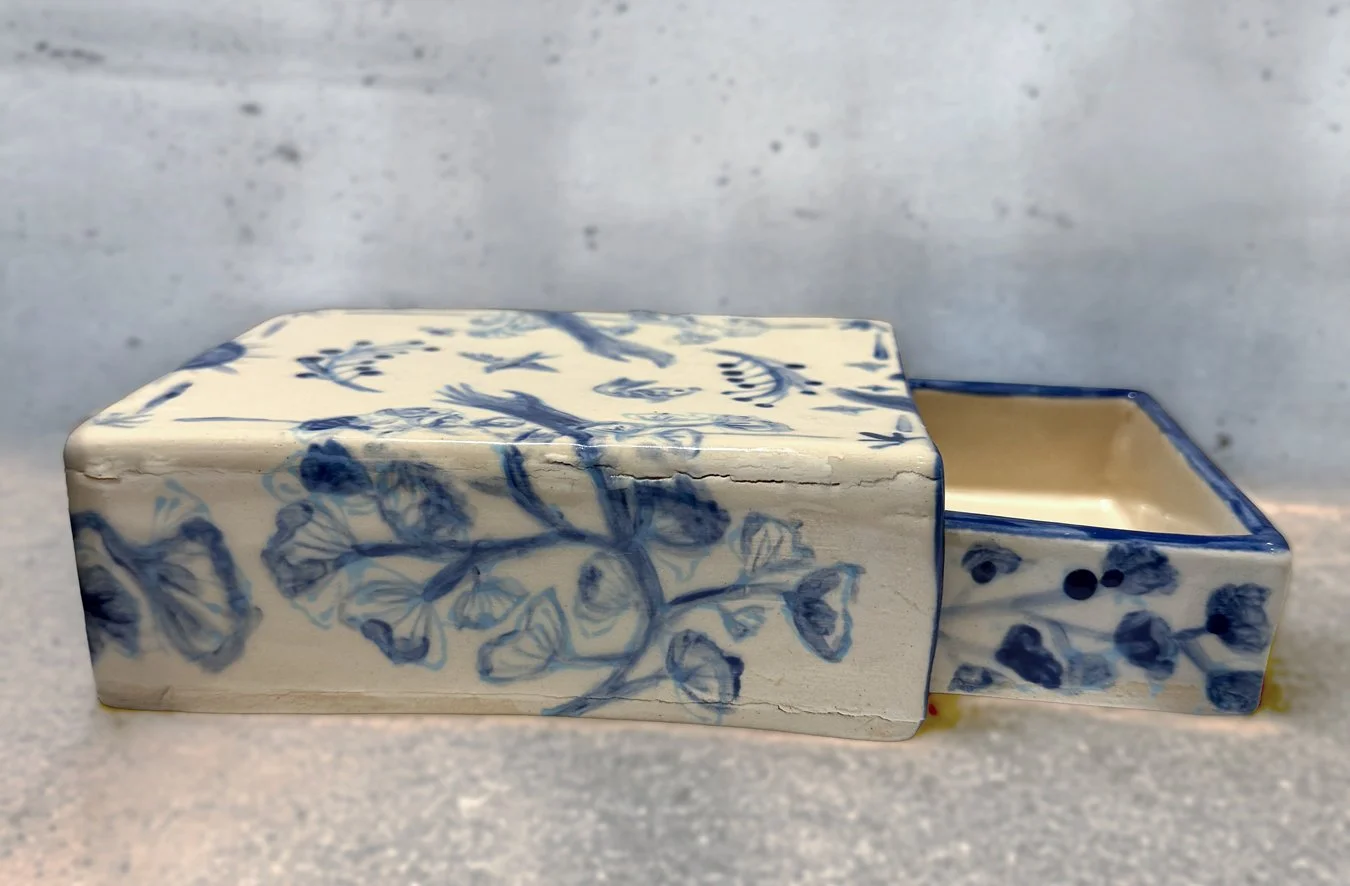
This is probably the most devastating… the cracks got worse. Double bummer. :-(
Second Try: terracotta box
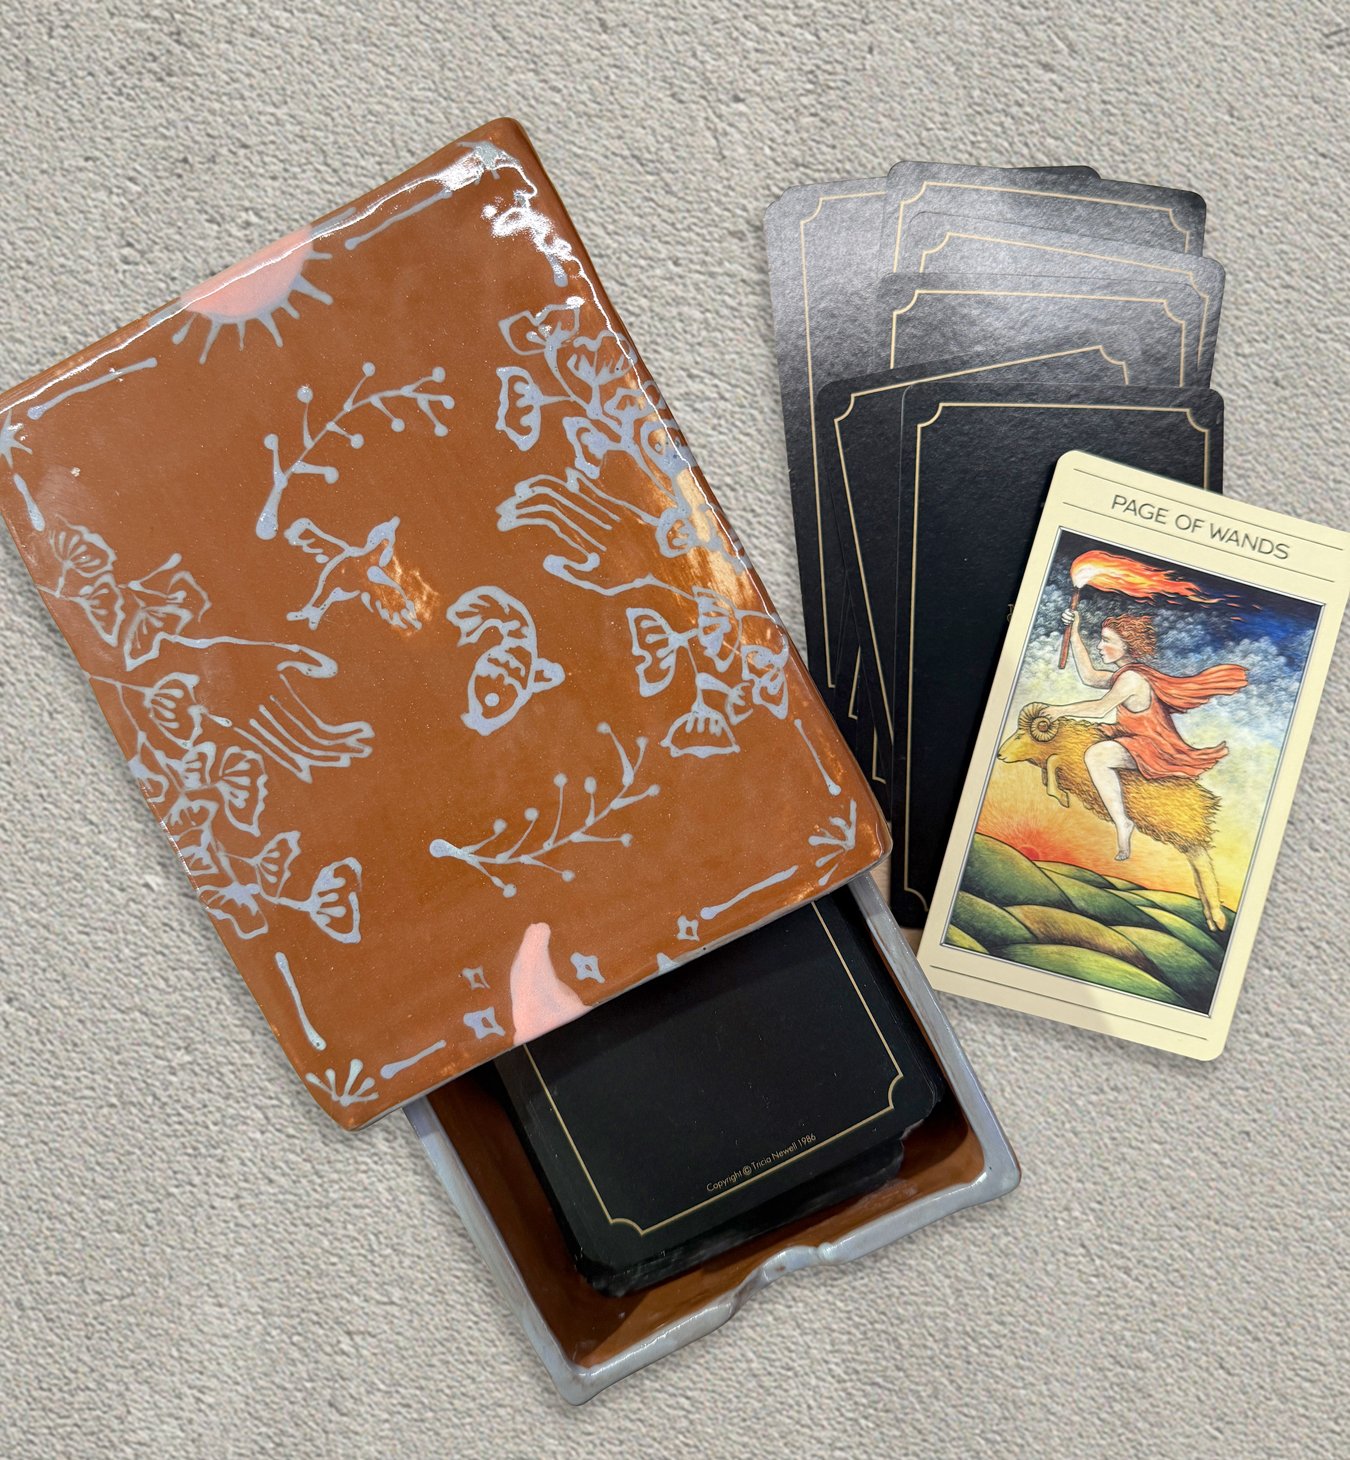
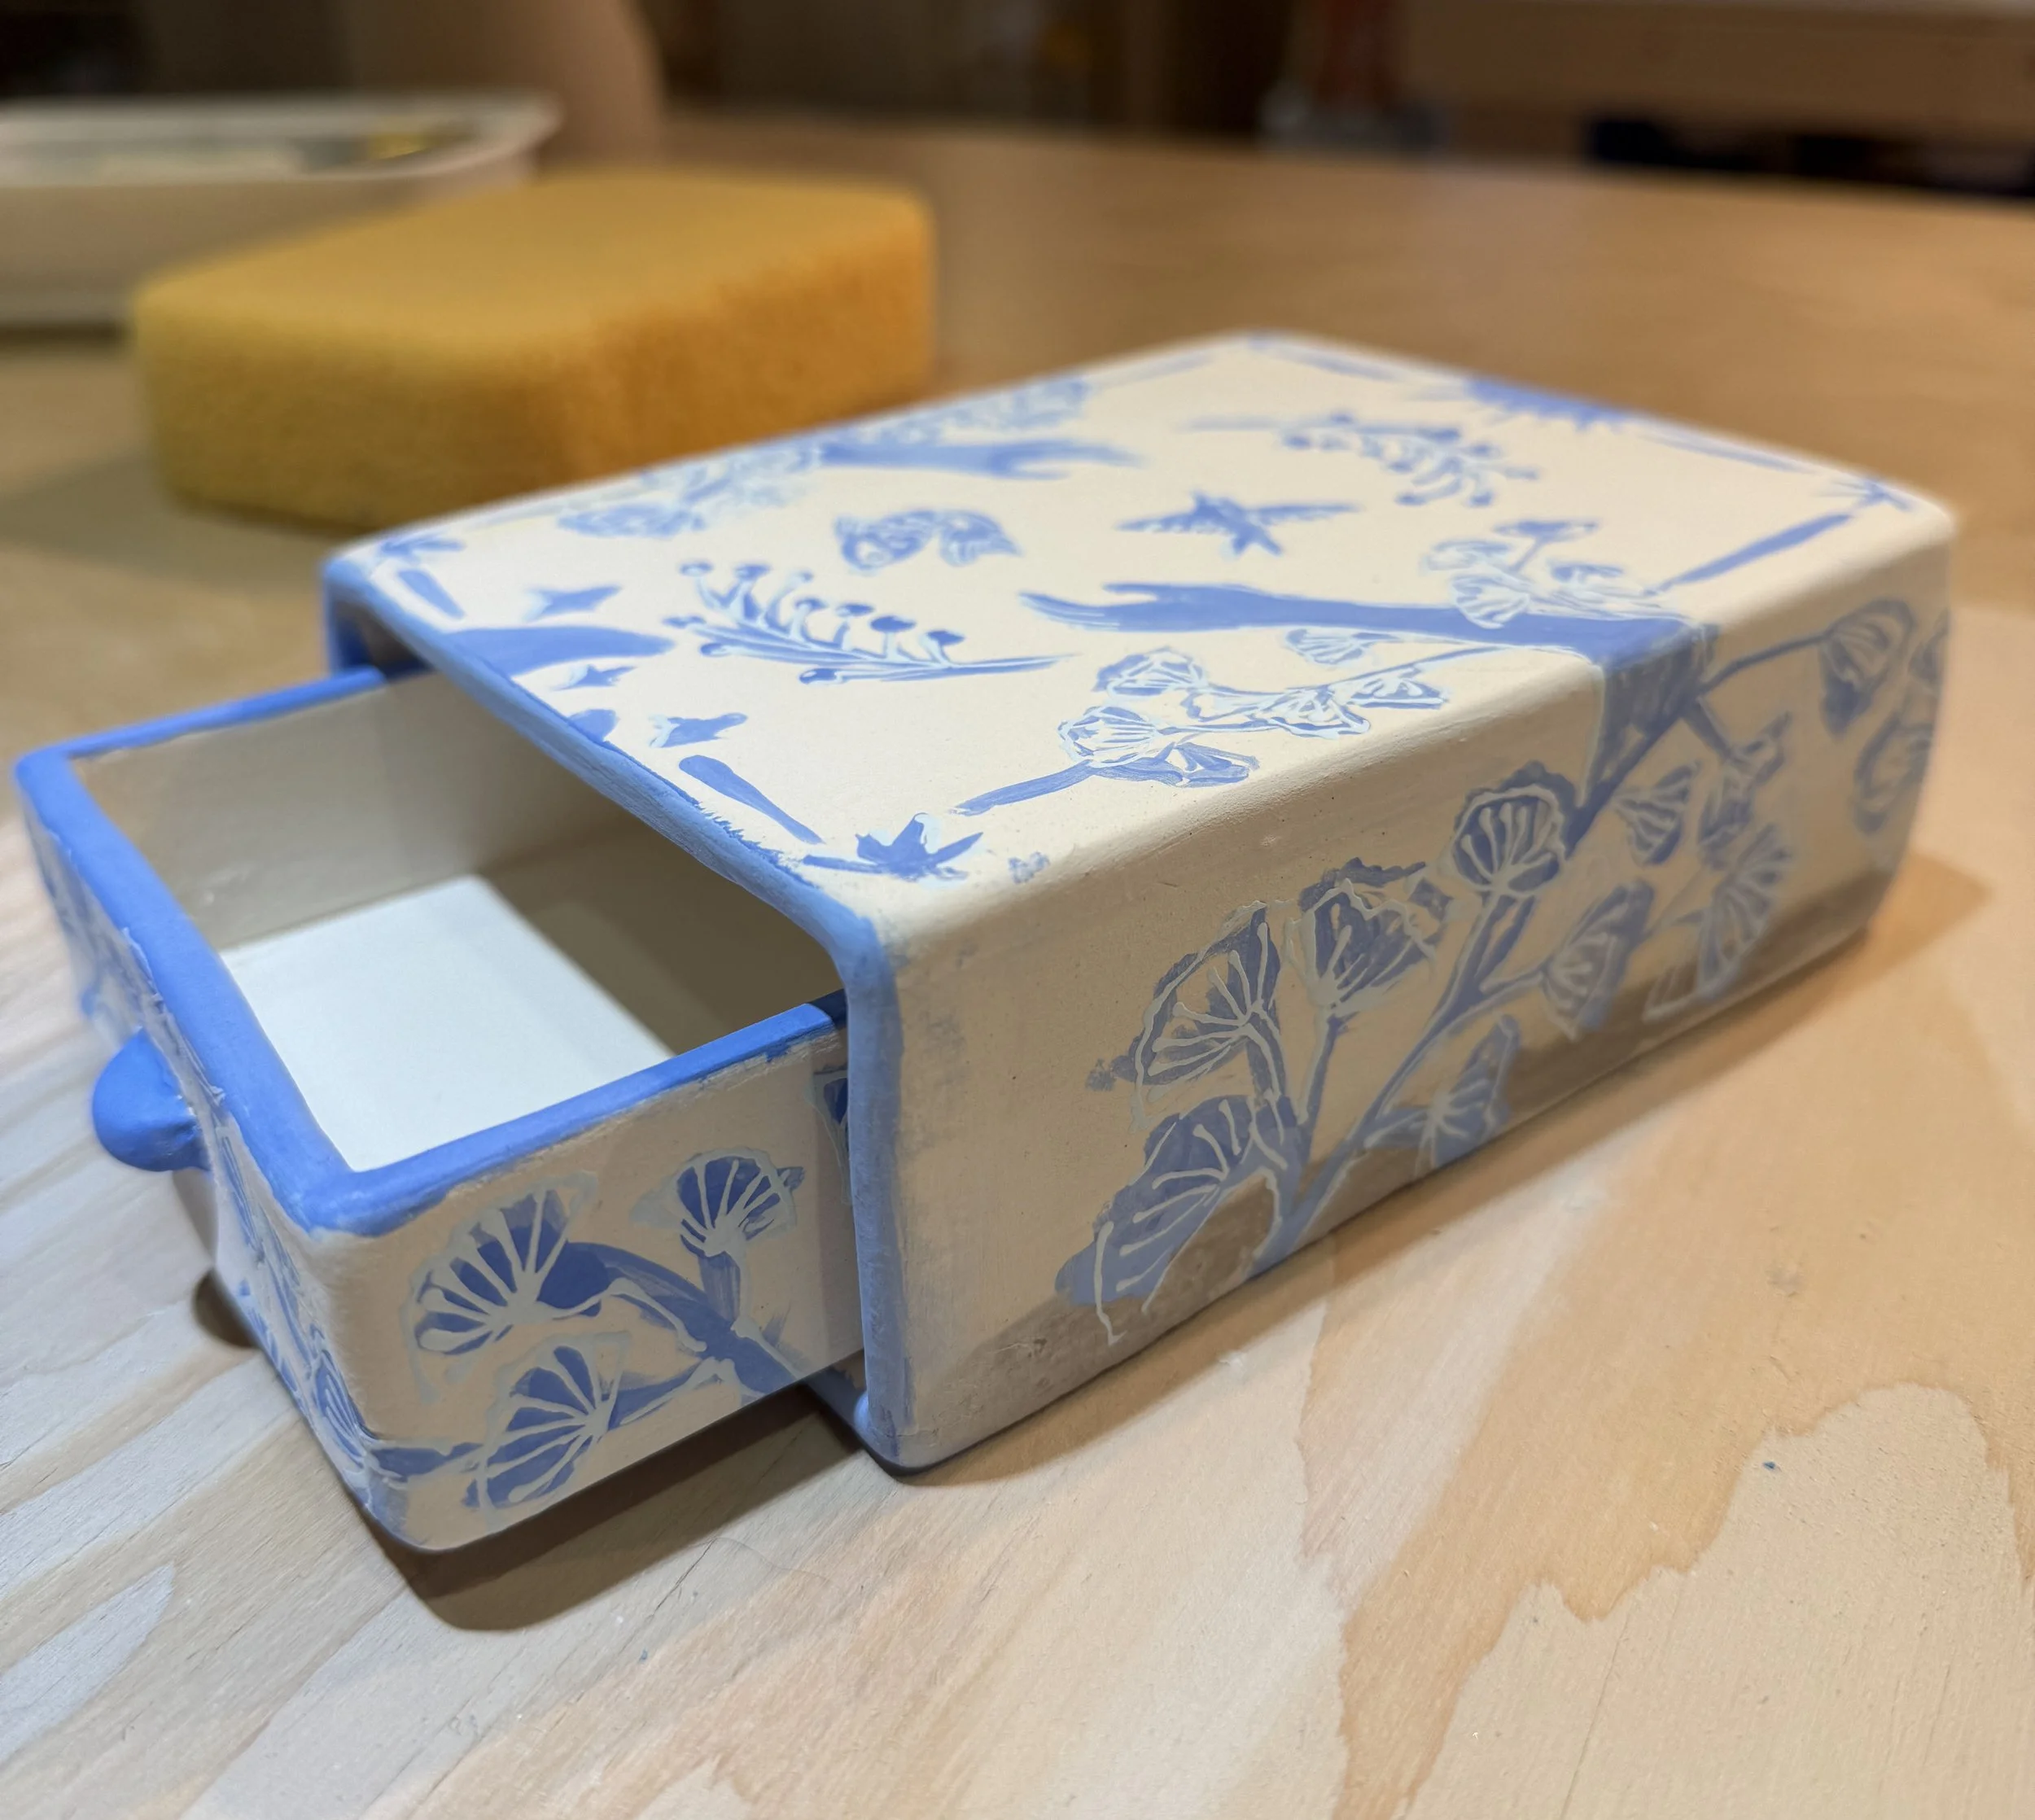
Spoke with other clay artists and did some online research, this is the second attempt at the tarot box. For the slab prep process, I did further compression and used coils to reenforce the joints. Also adjusted the template to allow more for shrinkage. The cards now fit! Still lots of room for improvement.
Under glaze on green ware.
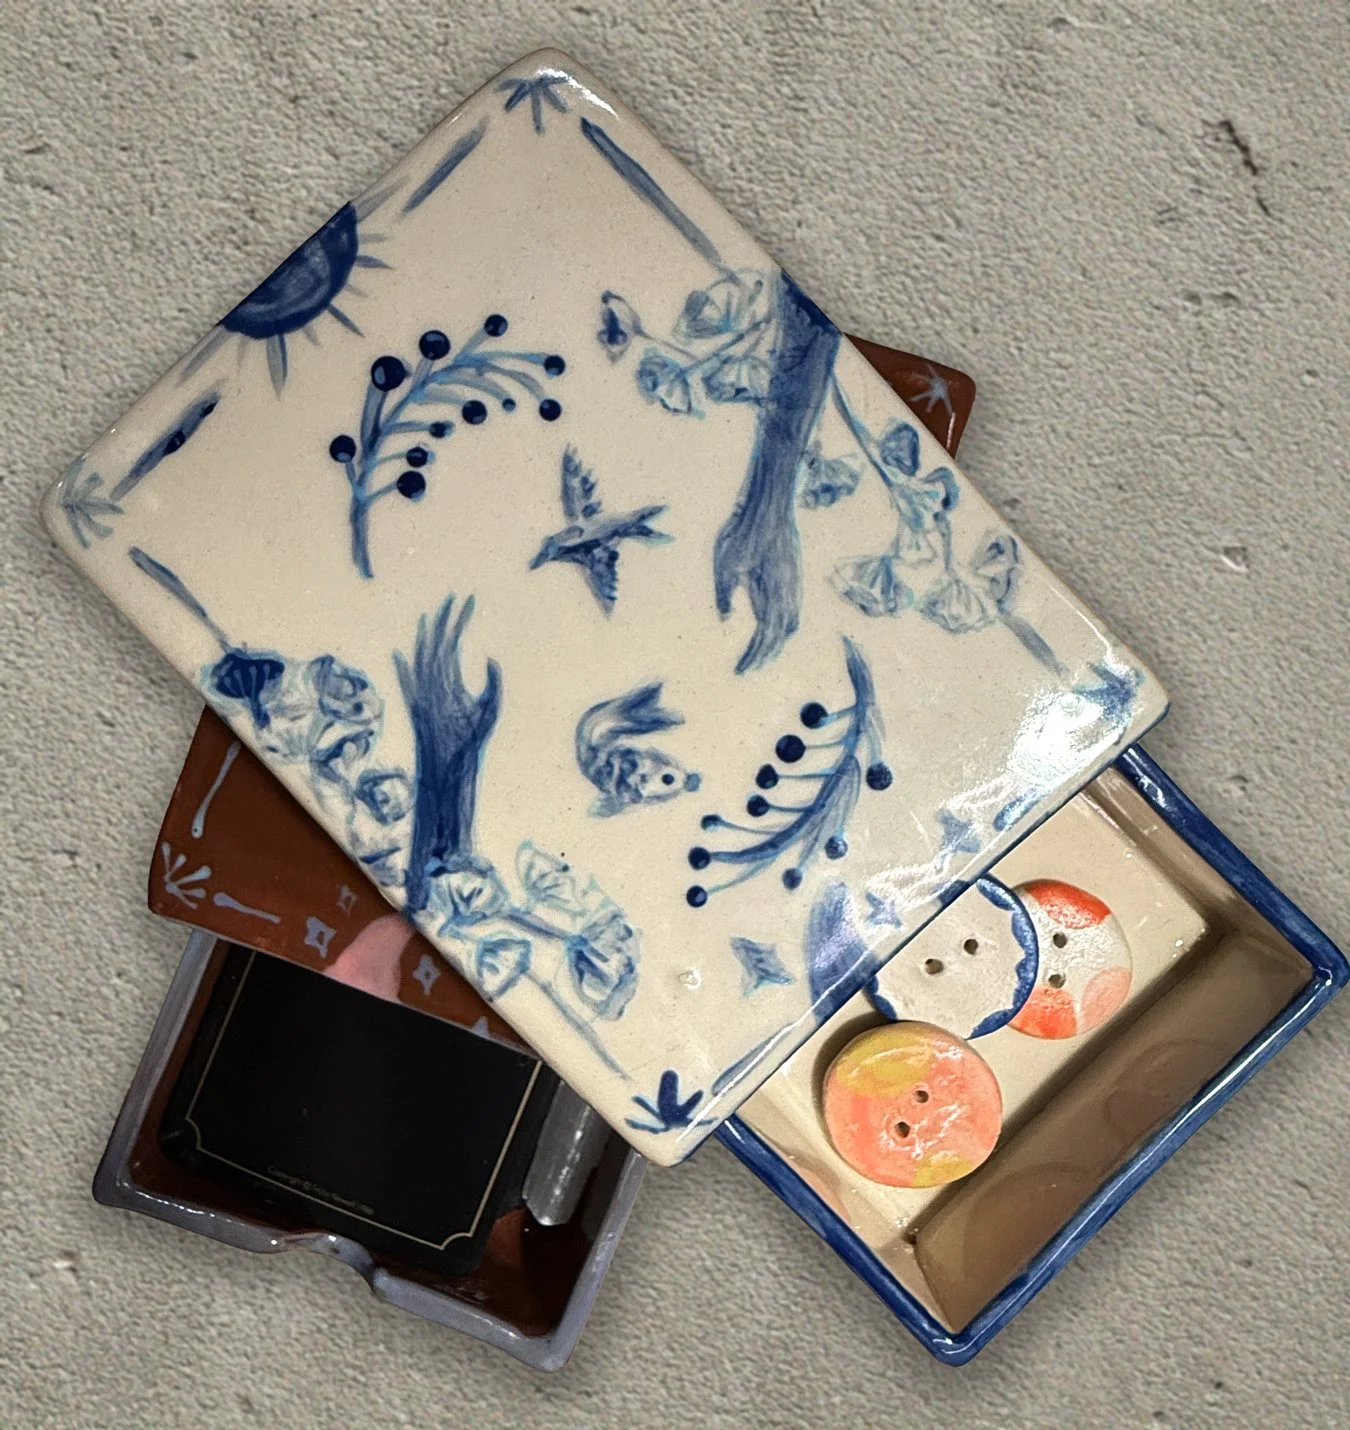
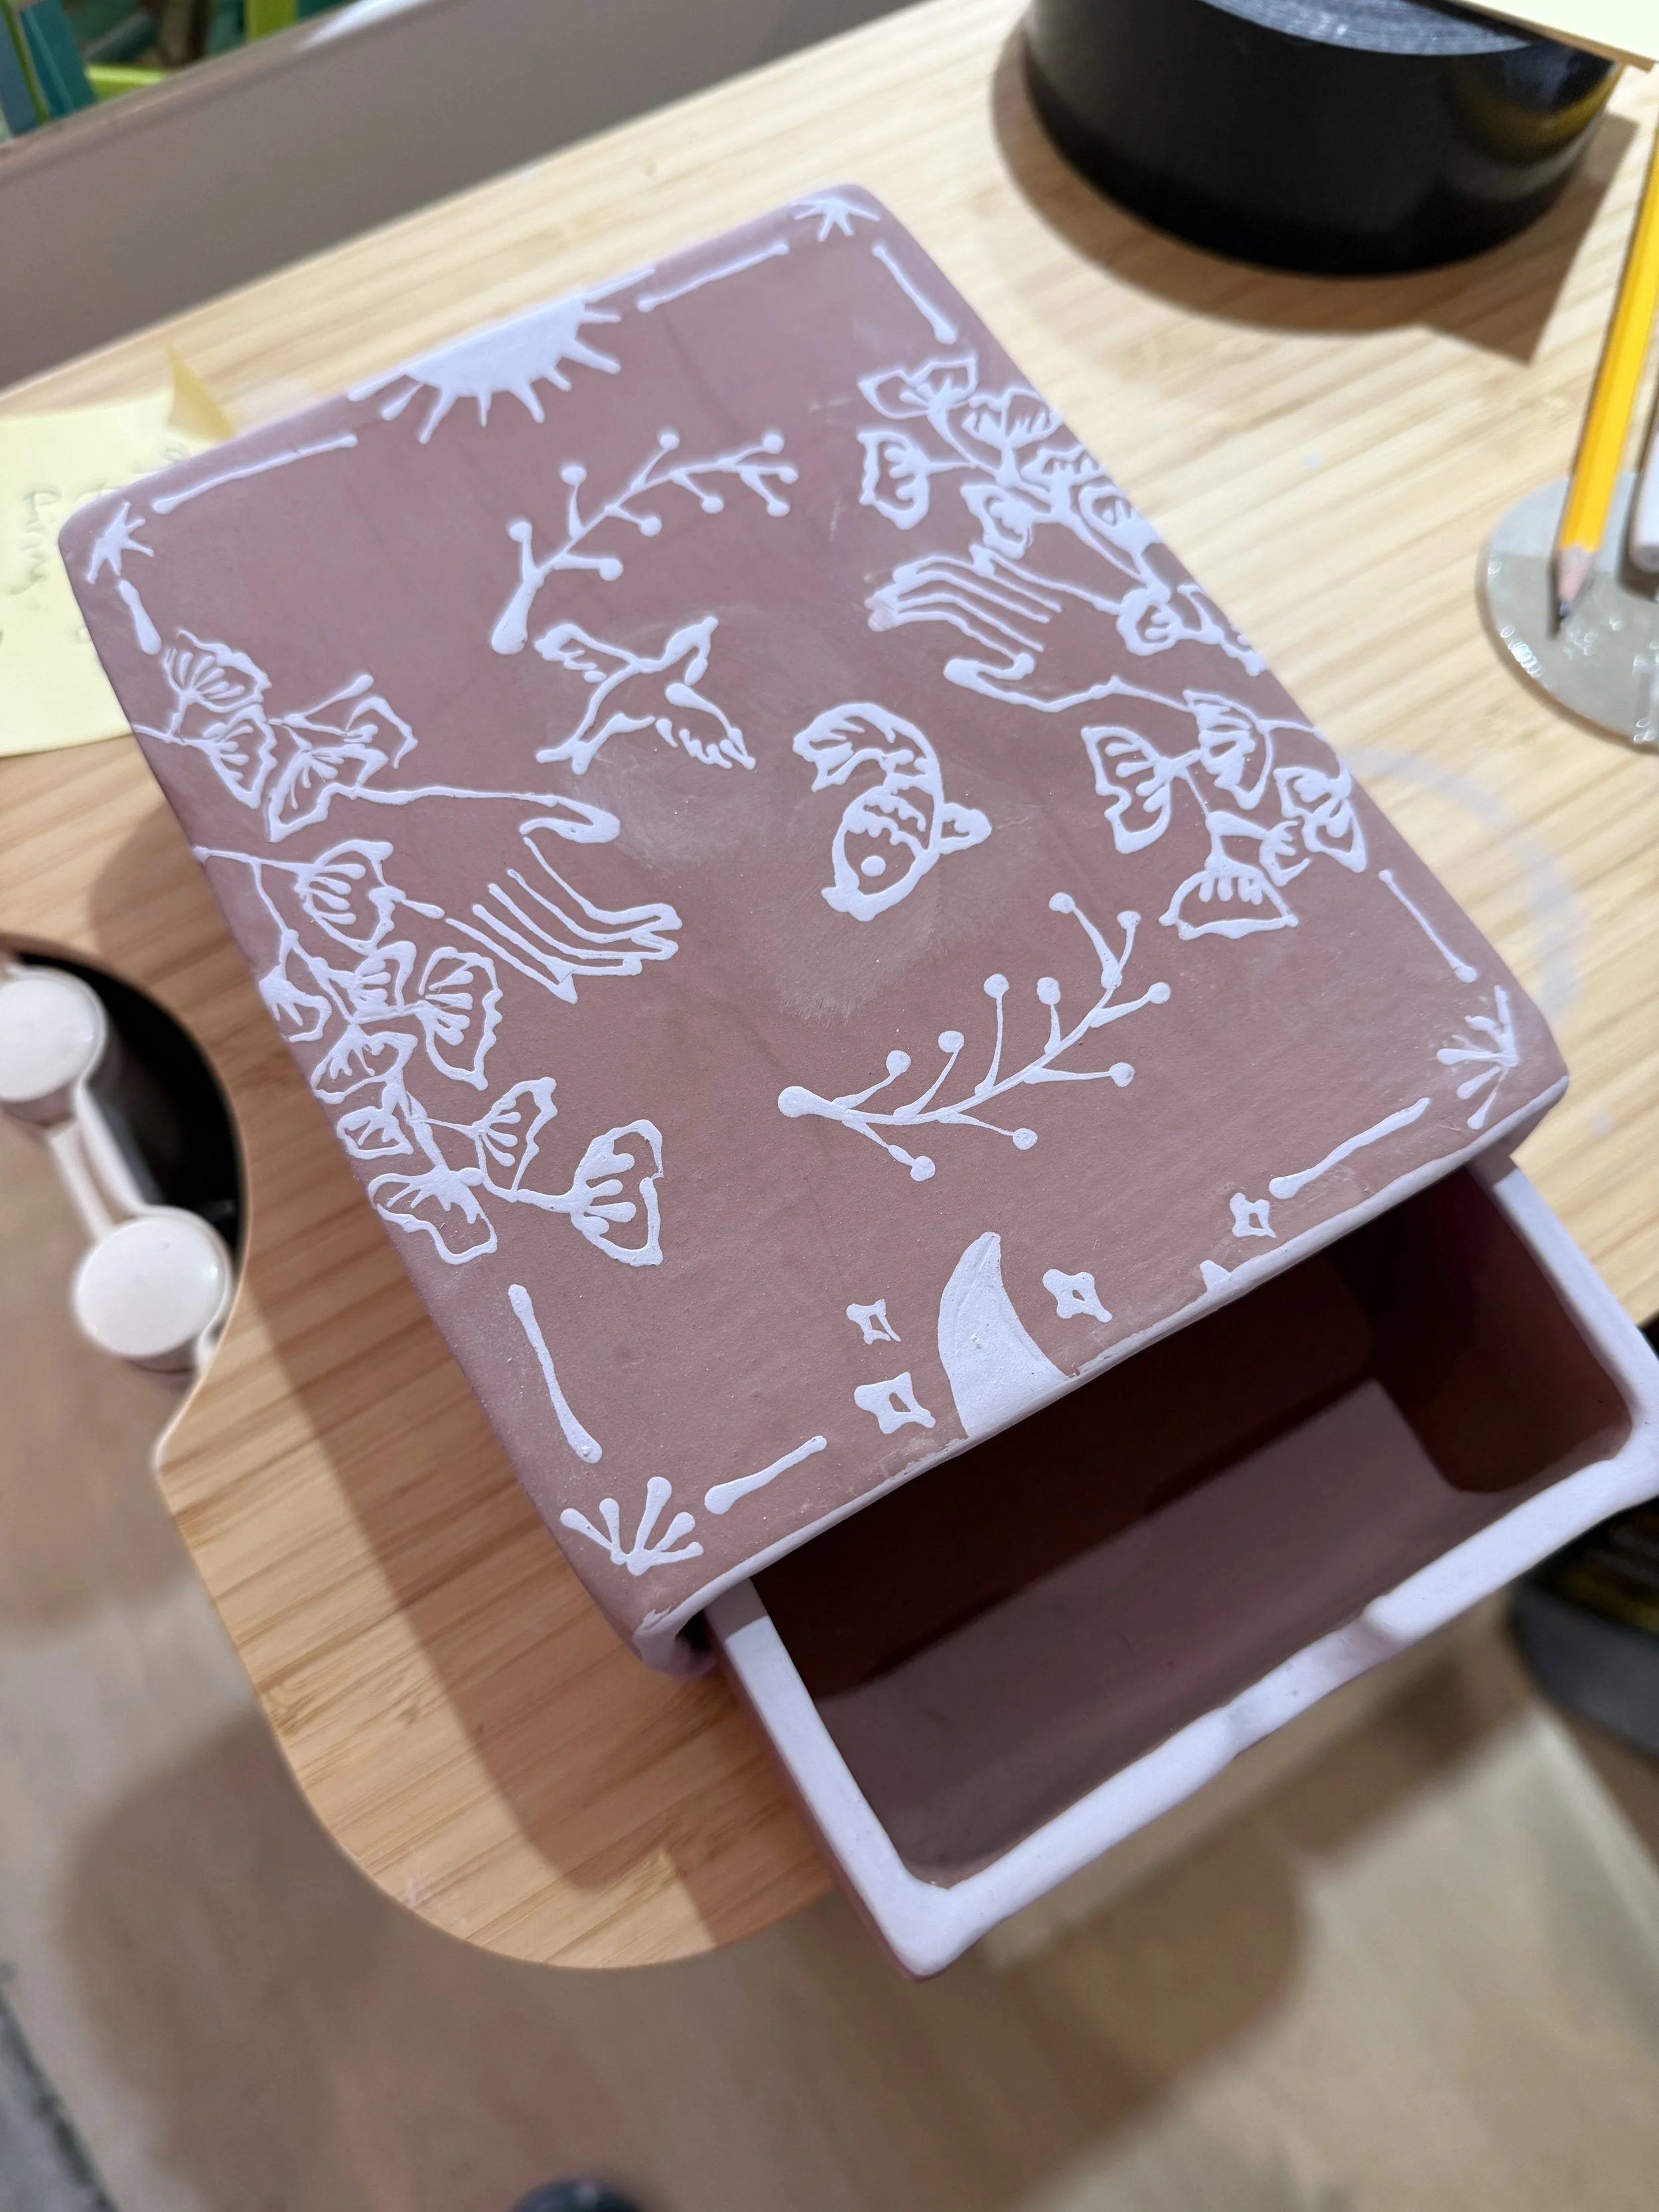
Because I can’t leave well enough alone and get bored easily, I experimented with a terracotta engobe. Also mixed a couple of coloured underglazes to achieve this bluish purple. This time I went for the applicator tool and skipped the brush. There’s a little more control in the line work but I think I can use a fine point. Due to the engobe, the ink jet print out transfer trick no longer worked so I have to freehand. The hands look a wonky.
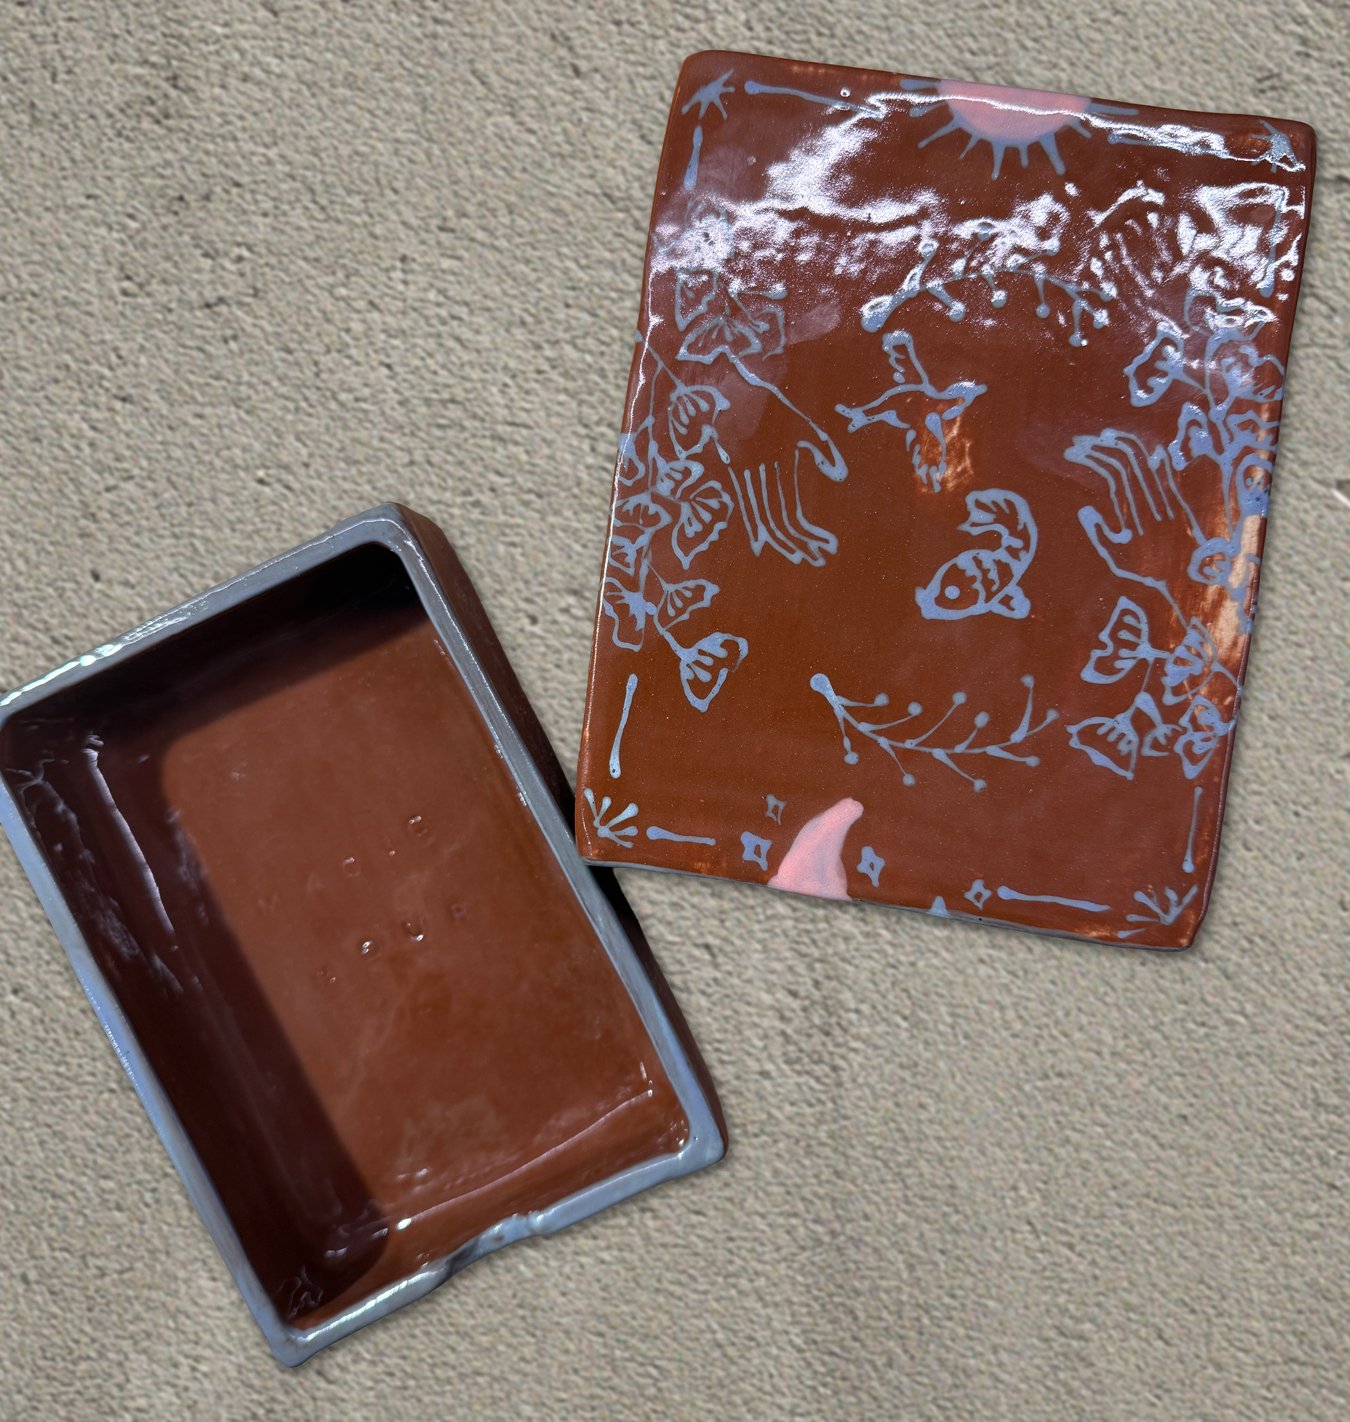
After bisque firing, a clear glossy glaze was added to the out side box and inside of the inner box. The rest were left in the matte terracotta engobe for texture contrast. Do you prefer the blue and white version or the terracotta?
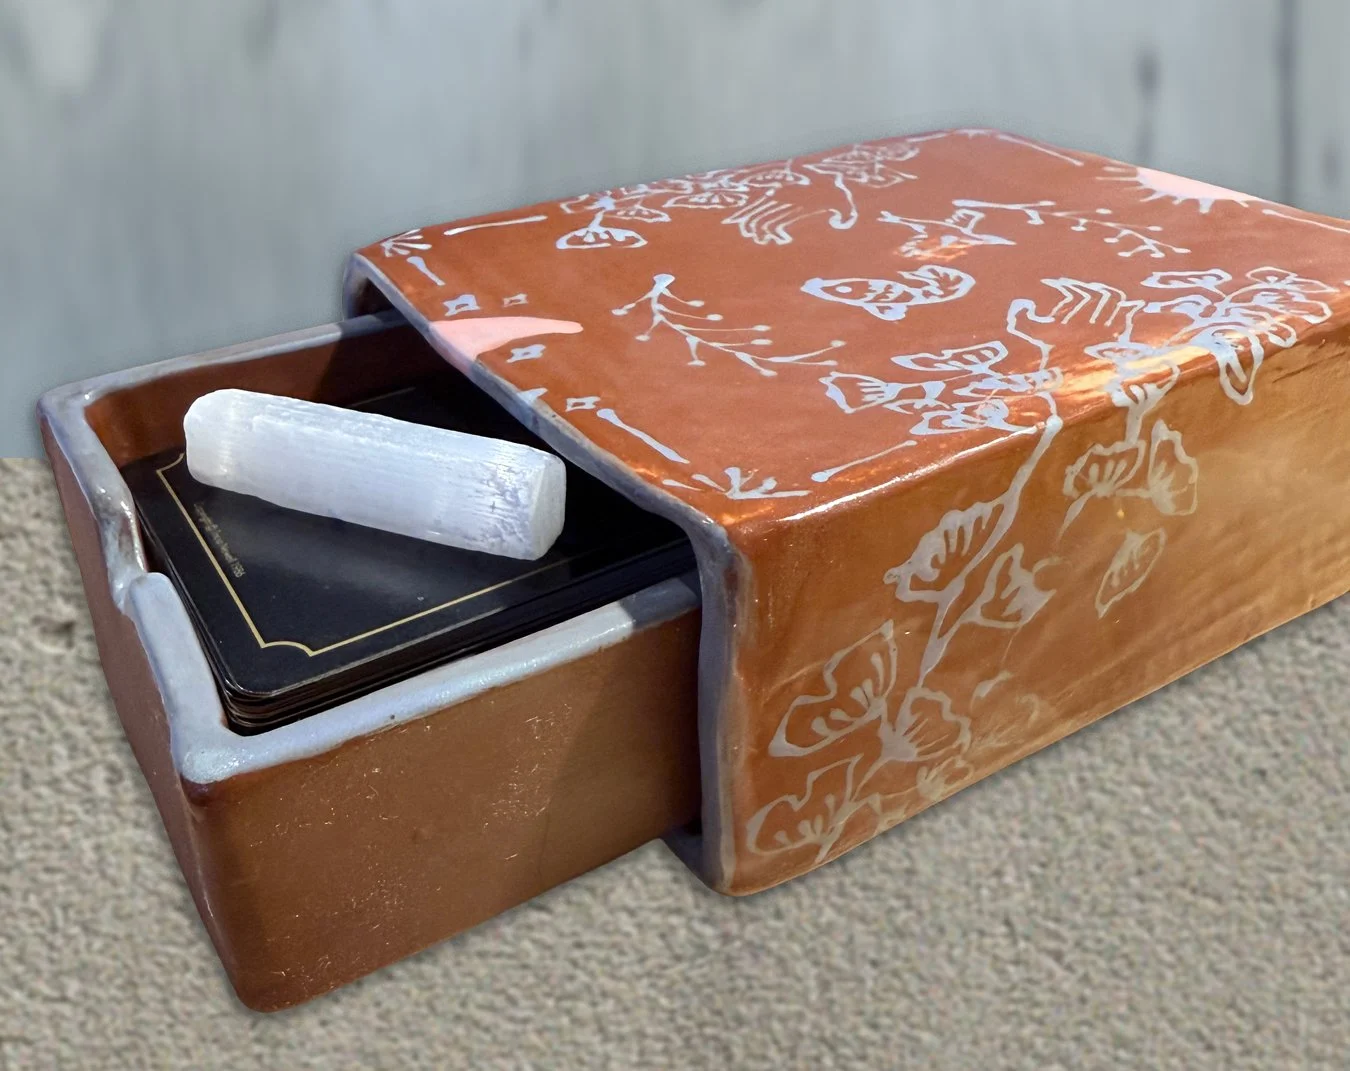
No more cracks and everything fits. There’s now extra room to add a crystal or two. I have a selenite that tucks in on the side of the deck. One technical part I can’t figure out yet is how to get rid of the warp on the top of the outer box opening. Some advice I was given: 1. compress more at slab stage. 2. assemble when the clay is dryer but still pliable, so before bone dry but maybe tail end of leather hard. Also, I think the engobe might have added to the warp because it was applied very thickly. If you have any helpful tips, I would love to hear about it! Please and thank you.